Wireframes visualize a user path or flow, as well as page layouts, information hierarchy, and even interactions. Depending on their purpose, they can vary in fidelity — from quick sketches to detailed representations of the final design.
For people with limited or no drawing abilities, wireframing can be daunting. Elsewhere we shared ideas for helping stakeholders get comfortable with sketching. The general principles hold true for everyone: Messy is completely fine and expected (especially for low-fidelity wireframes). Use physical constraints to prevent obsessing over tiny aesthetic details:
- Thick pens or sharpies
- Time boxing
- Limited space for the sketch
Step-by-Step Sketching Guide
There are some common components that are used in wireframes time and again. If you know how to sketch these basic pieces, you can focus on getting your idea right rather than on how to draw. Here is a step-by-step guide to get you sketching quickly.
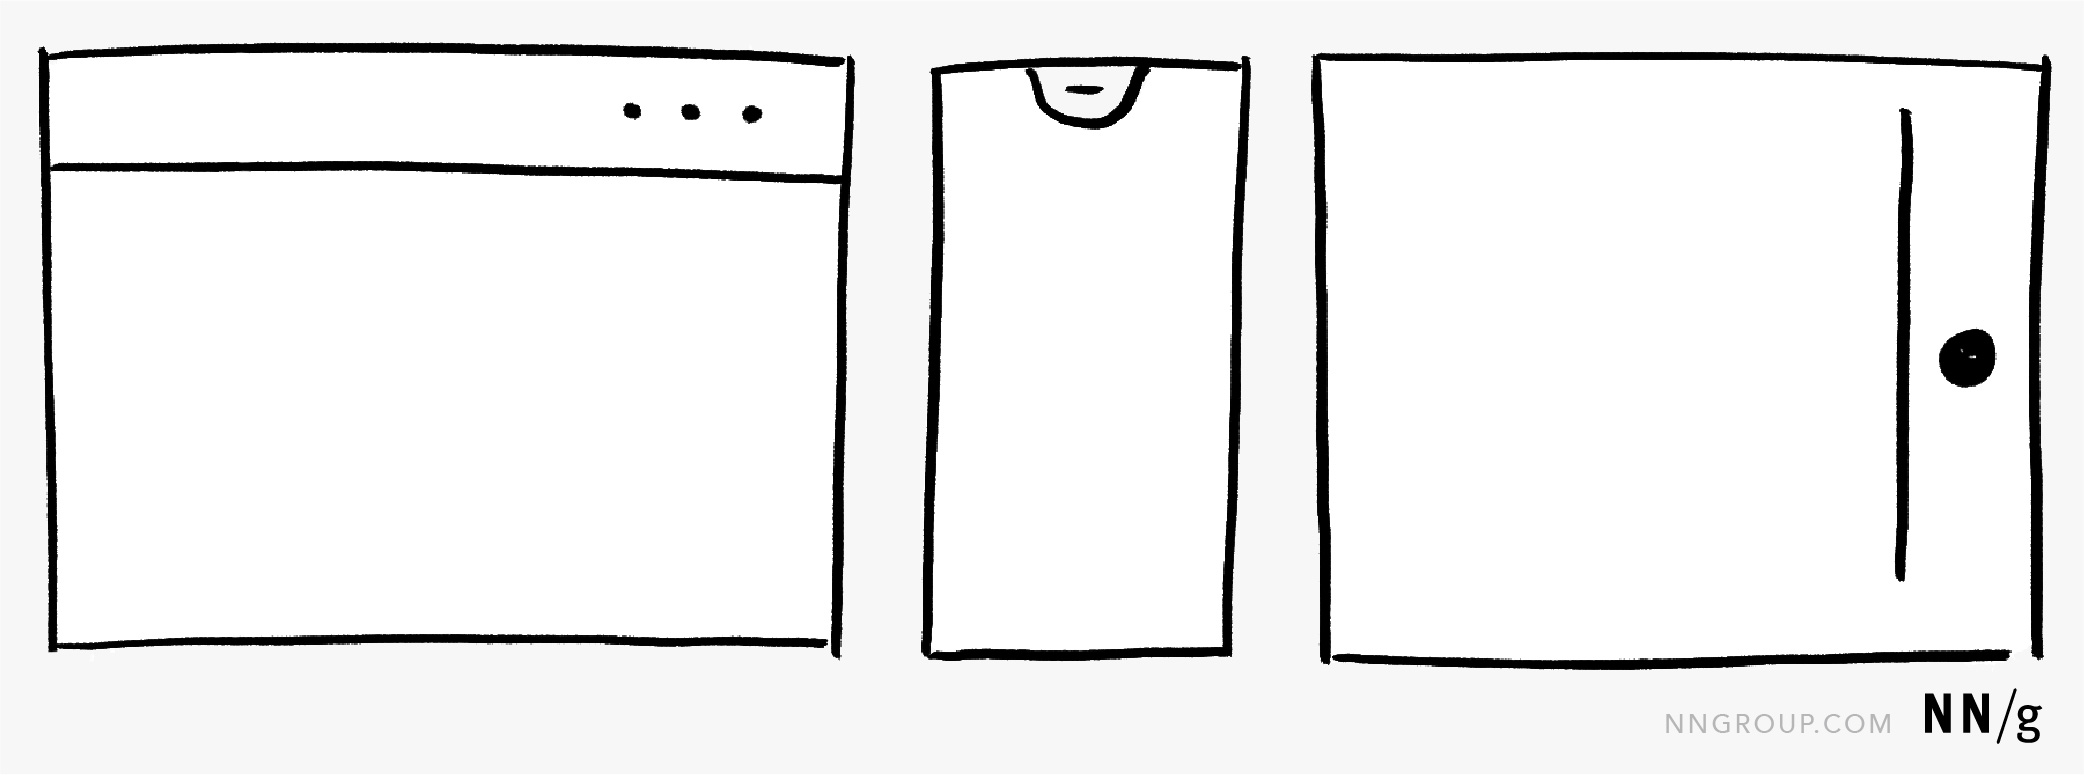
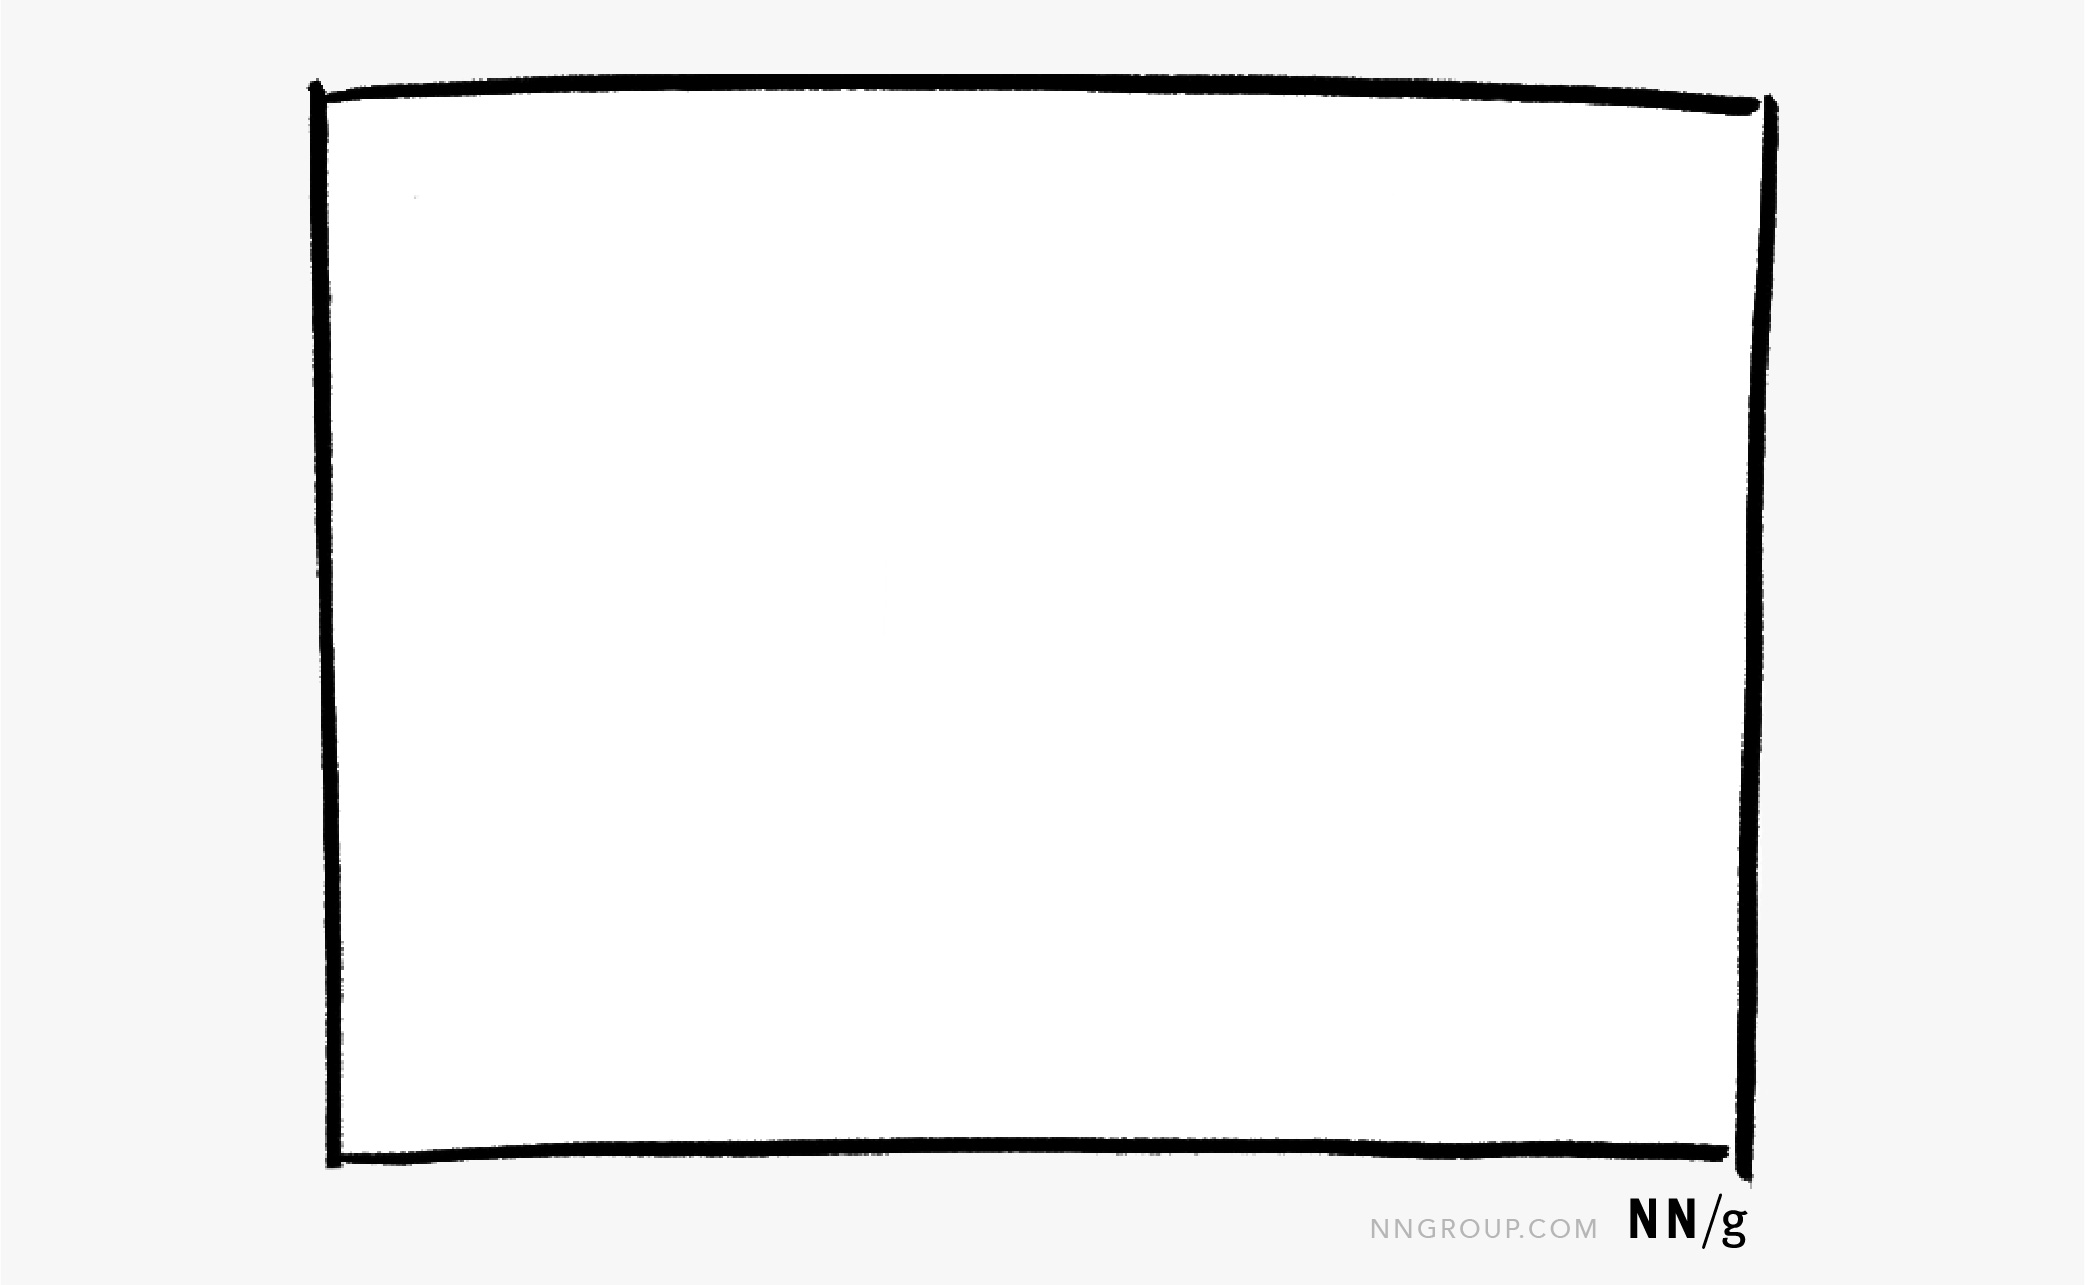
Step 1: Identify your browser-window or device aspect ratio.
This ratio doesn’t have to be precise especially if you are sketching by hand. For a higher-fidelity wireframe, here are some starting dimensions:
- For web wireframes, some common breakpoint sizes are 1024x768 pixels and 1920x1080 pixels.
- For mobile, the dimensions will range based on the specific device (e.g., tablet, various-size phones). Start by finding out what device you should optimize for.
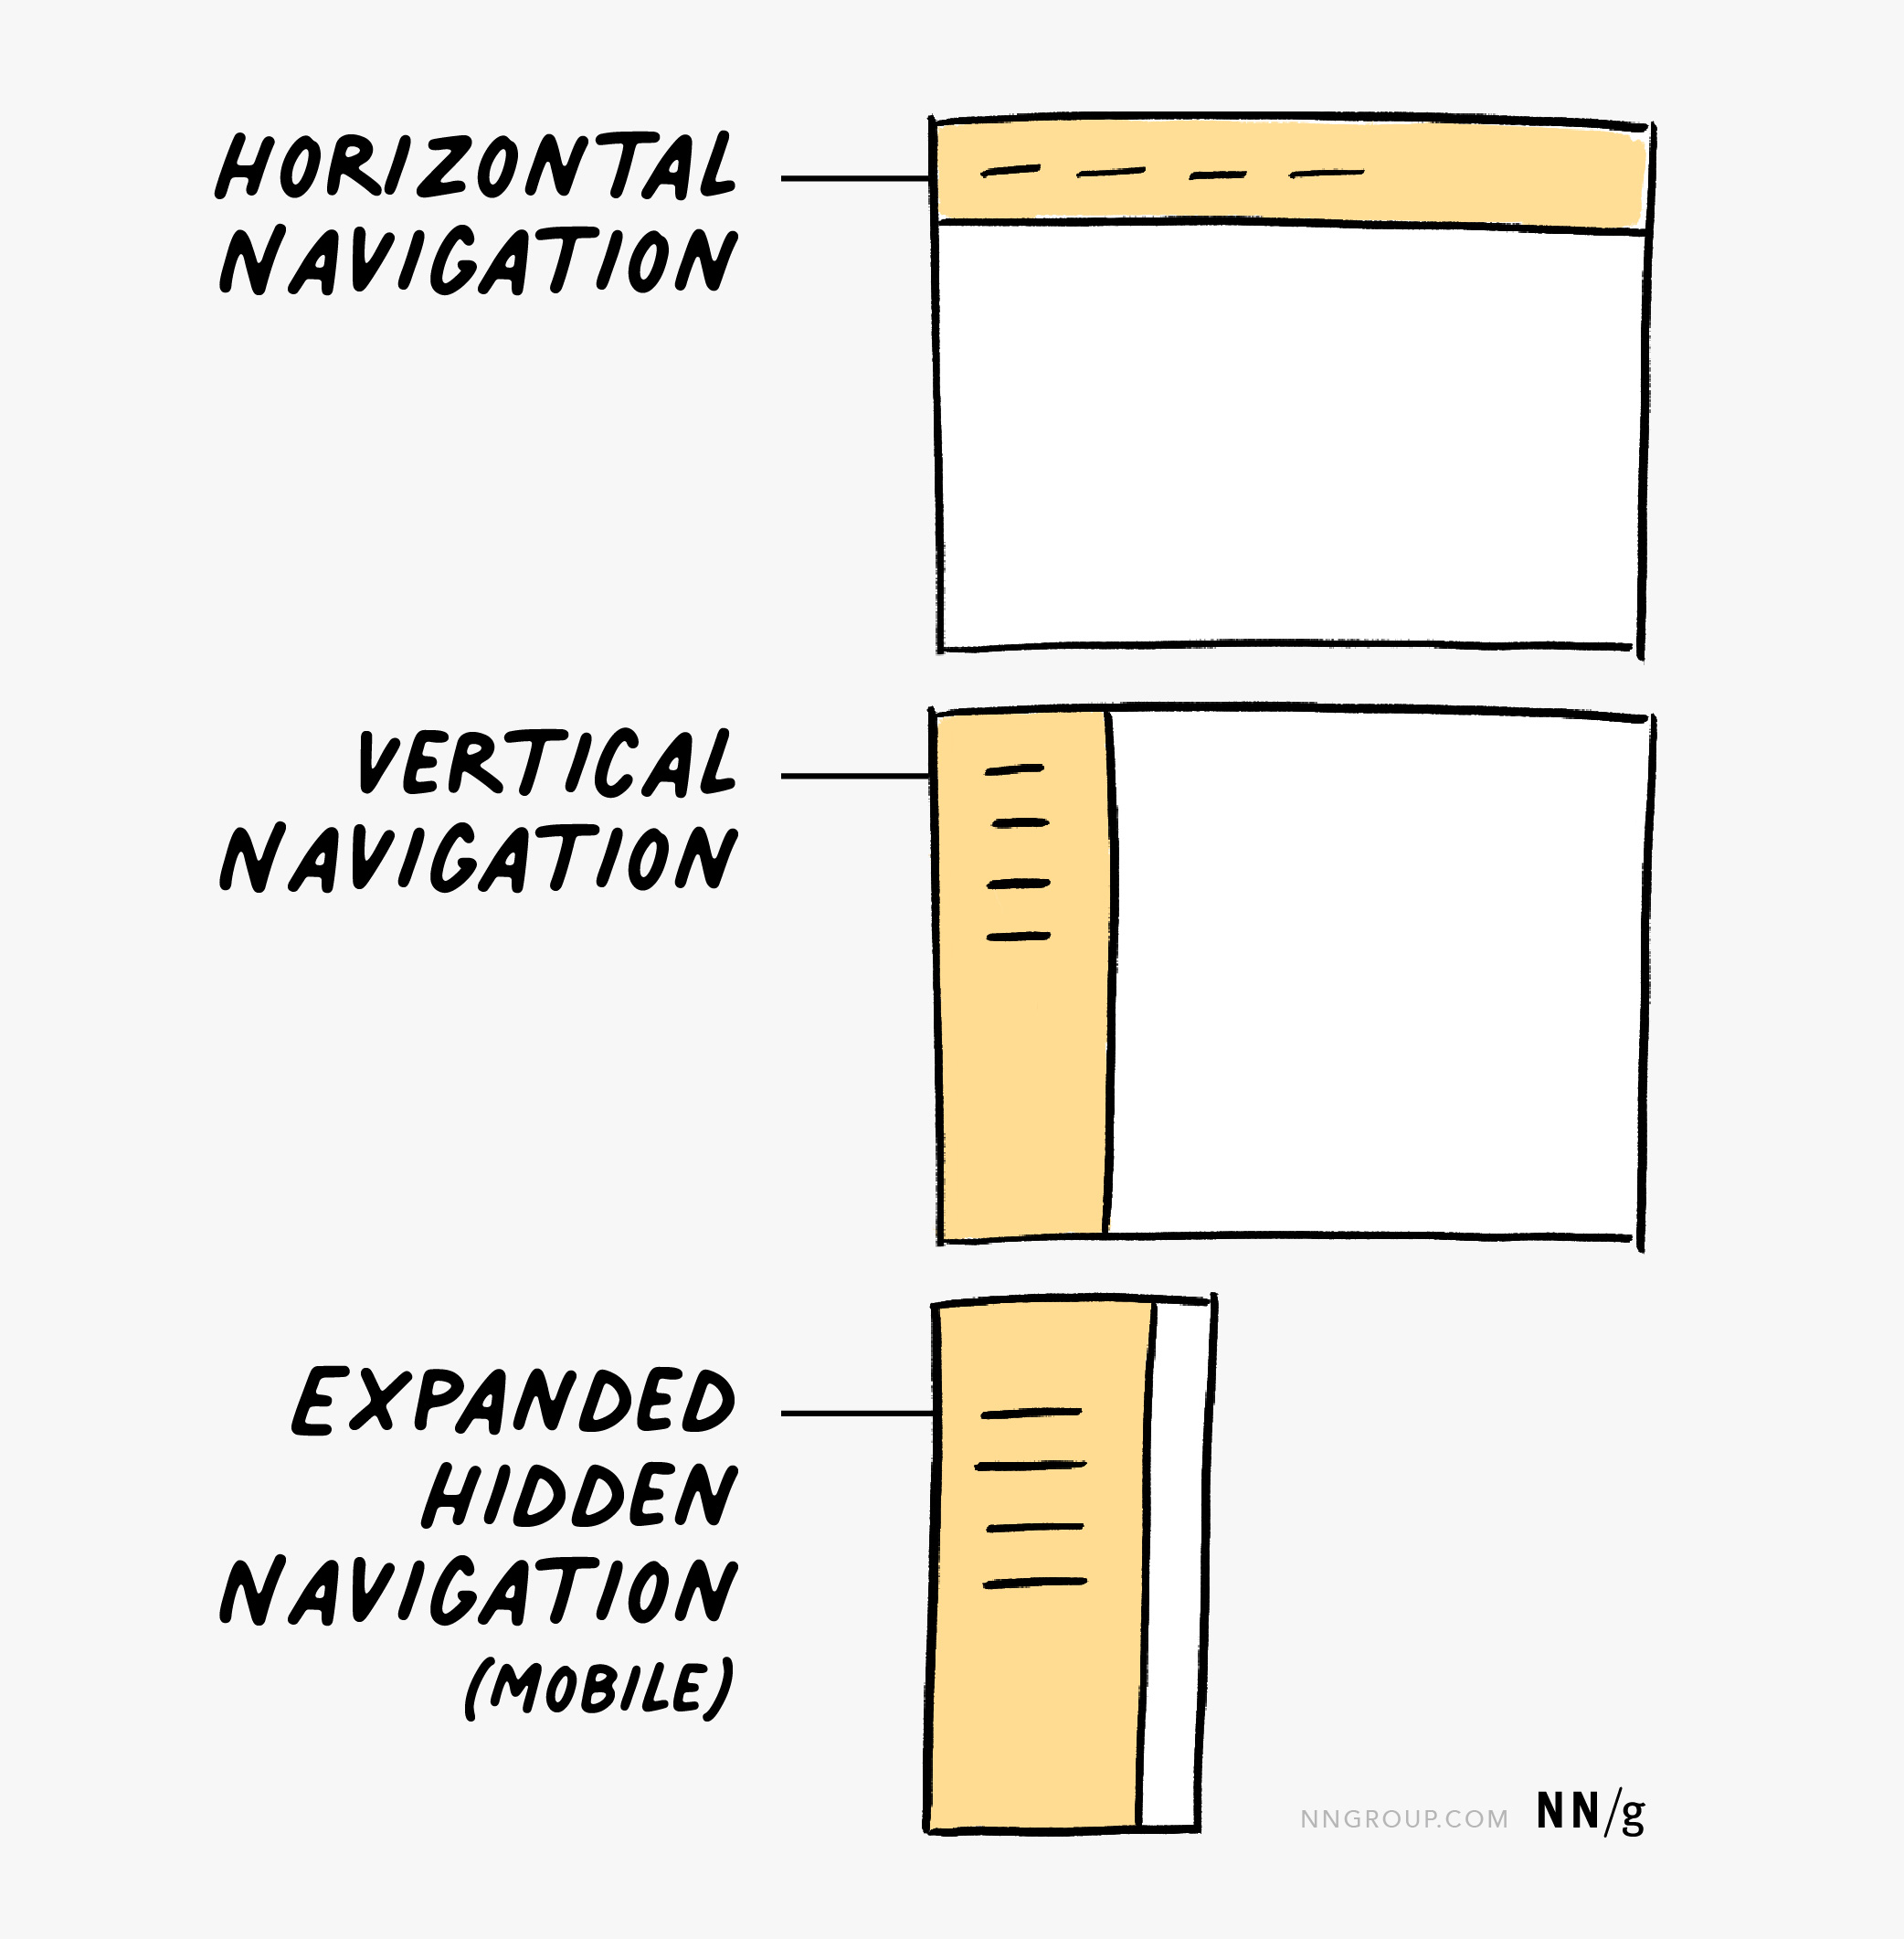
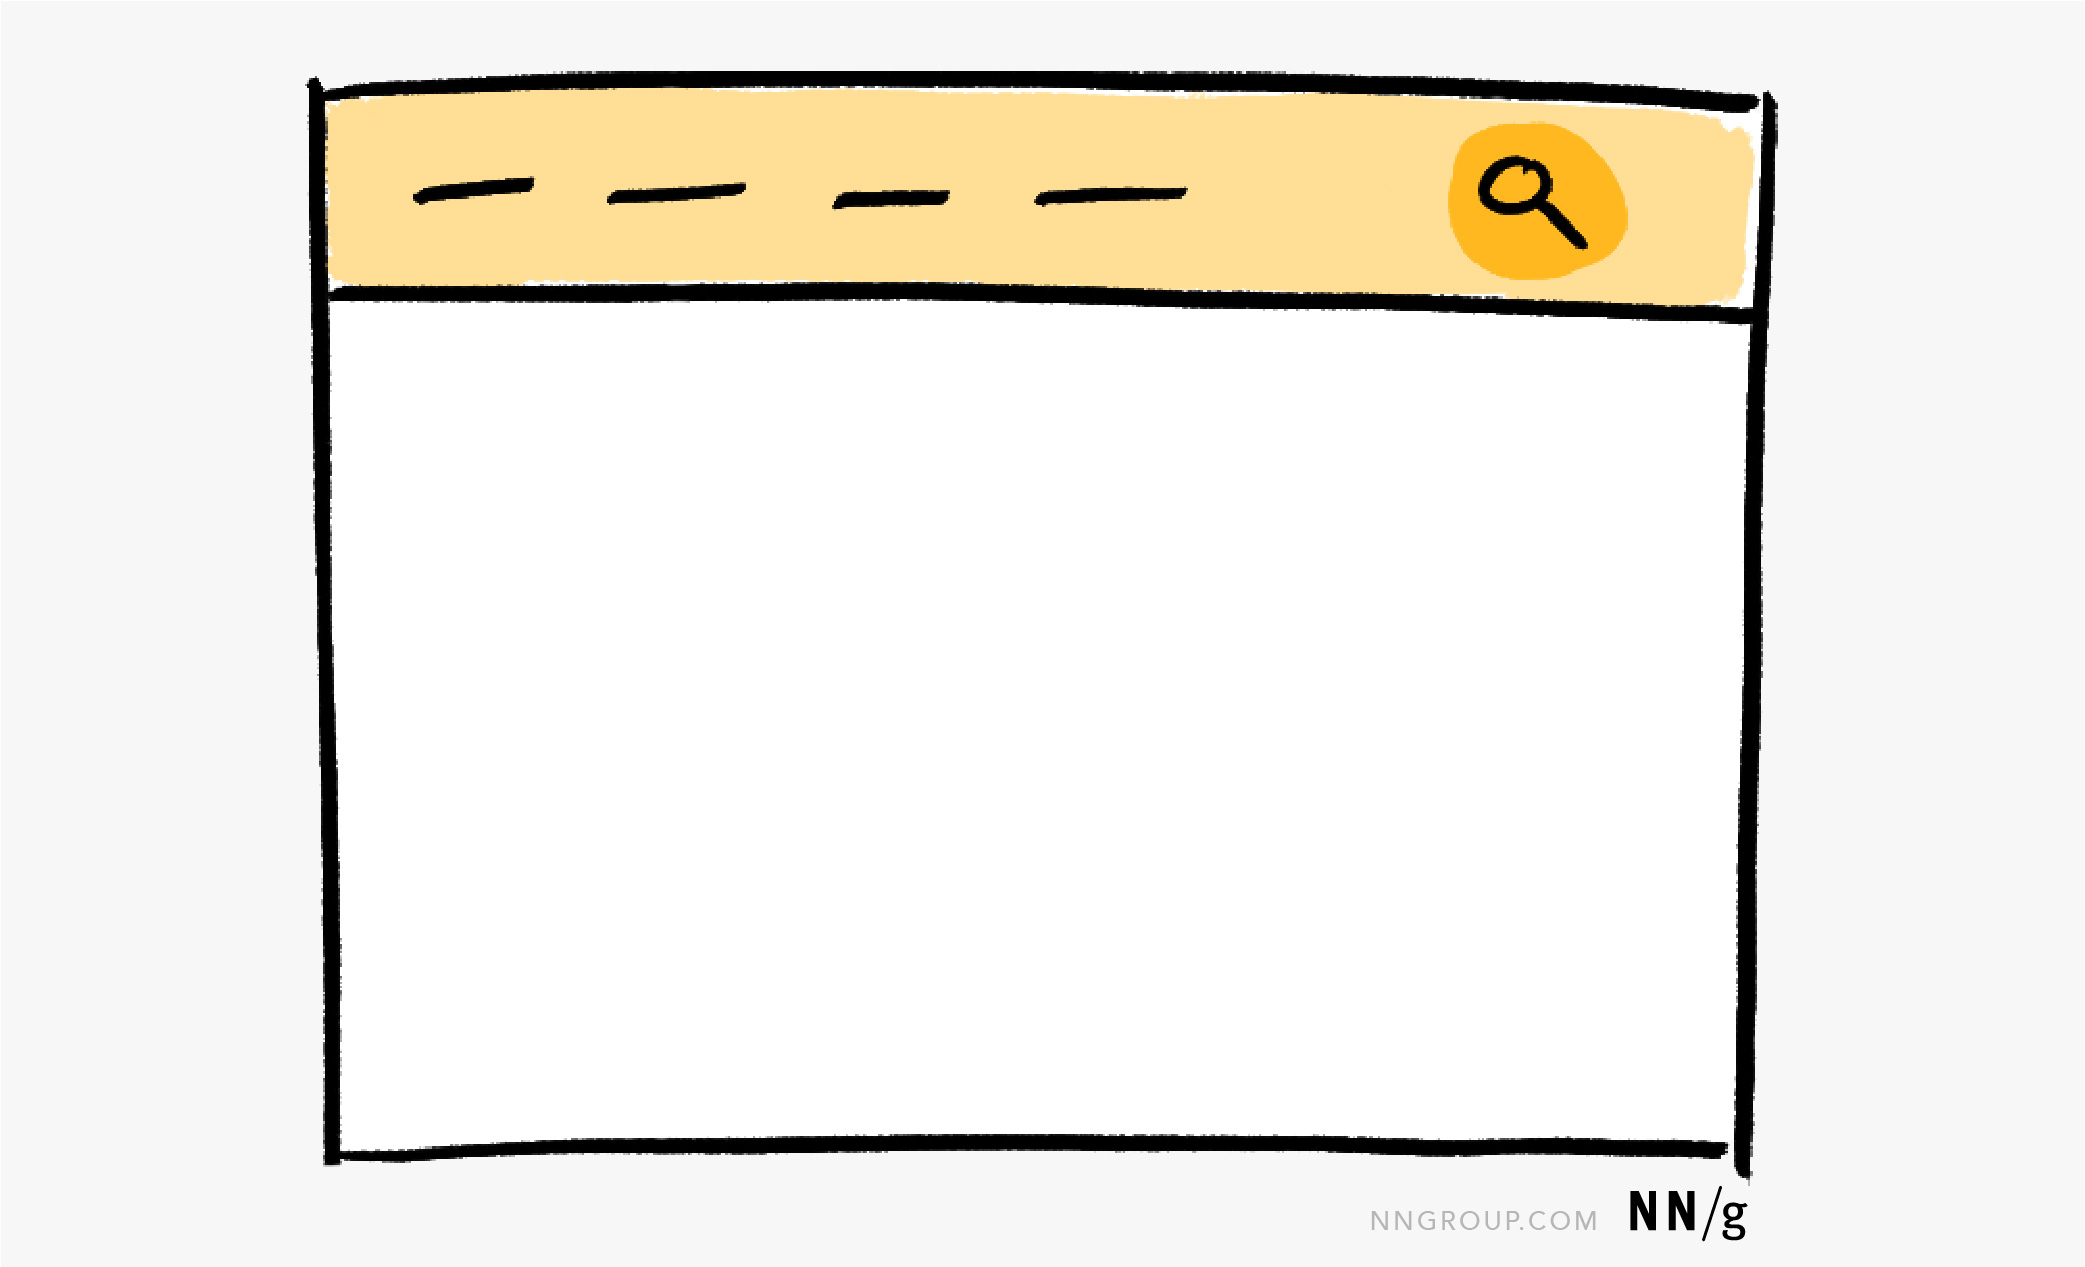
Step 2: Draw the navigation and search.
Navigation and search add context to a wireframe. If you are following an existing design or template, draw the framework that’s already in place — for example, put a navigation bar at the top of the page if you know all your pages have it.
If you are starting from scratch, think about what type of navigation might work. (Remember, you don’t need to get it right the first time around.) Indicate a navigation bar (whether horizontal or vertical) by drawing a rectangle in the corresponding position on the page. If you’re using hidden navigation, show it expanded or not, depending on your focus. If you want to show that you’re on a specific navigation link, underline or put a box around that link.
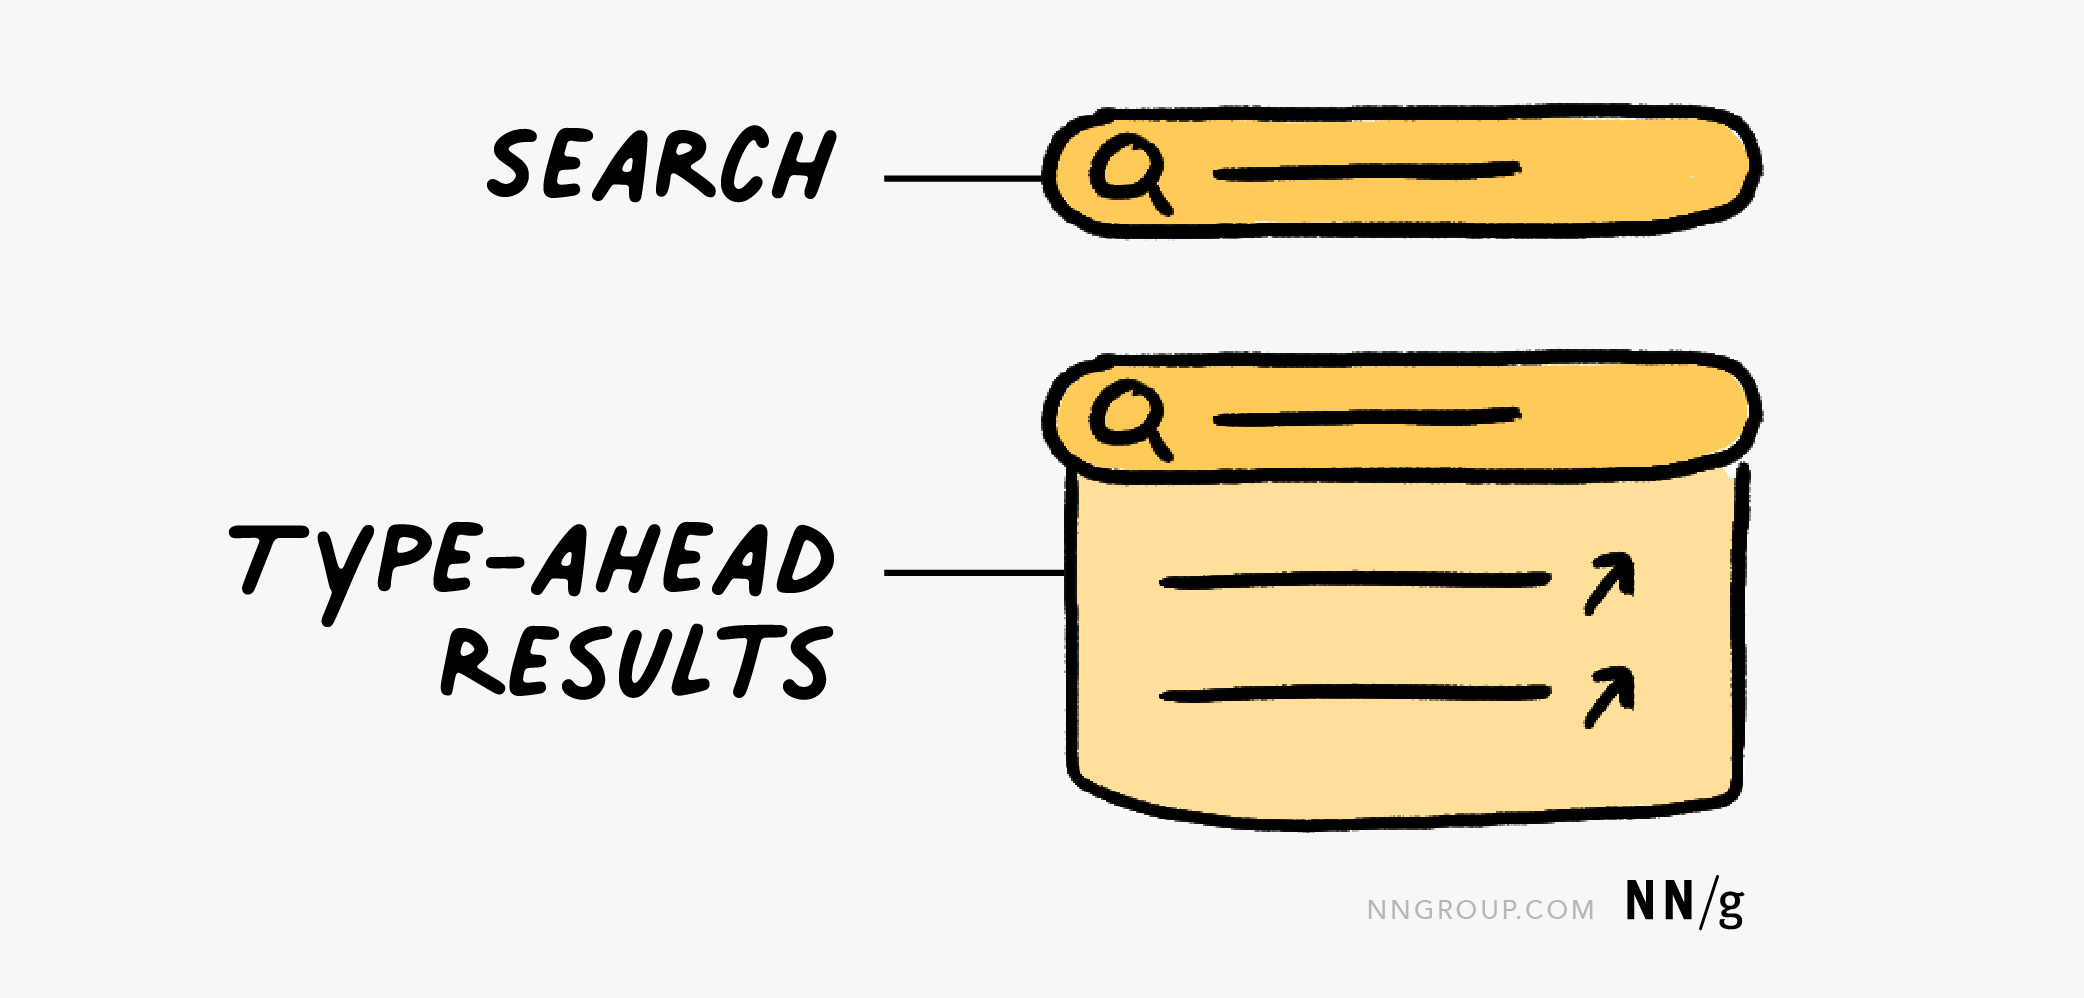
The search feature can be represented through a search icon and the associated search box, like in the examples below. If needed, you can show search-suggestions in a rectangle under the search box.
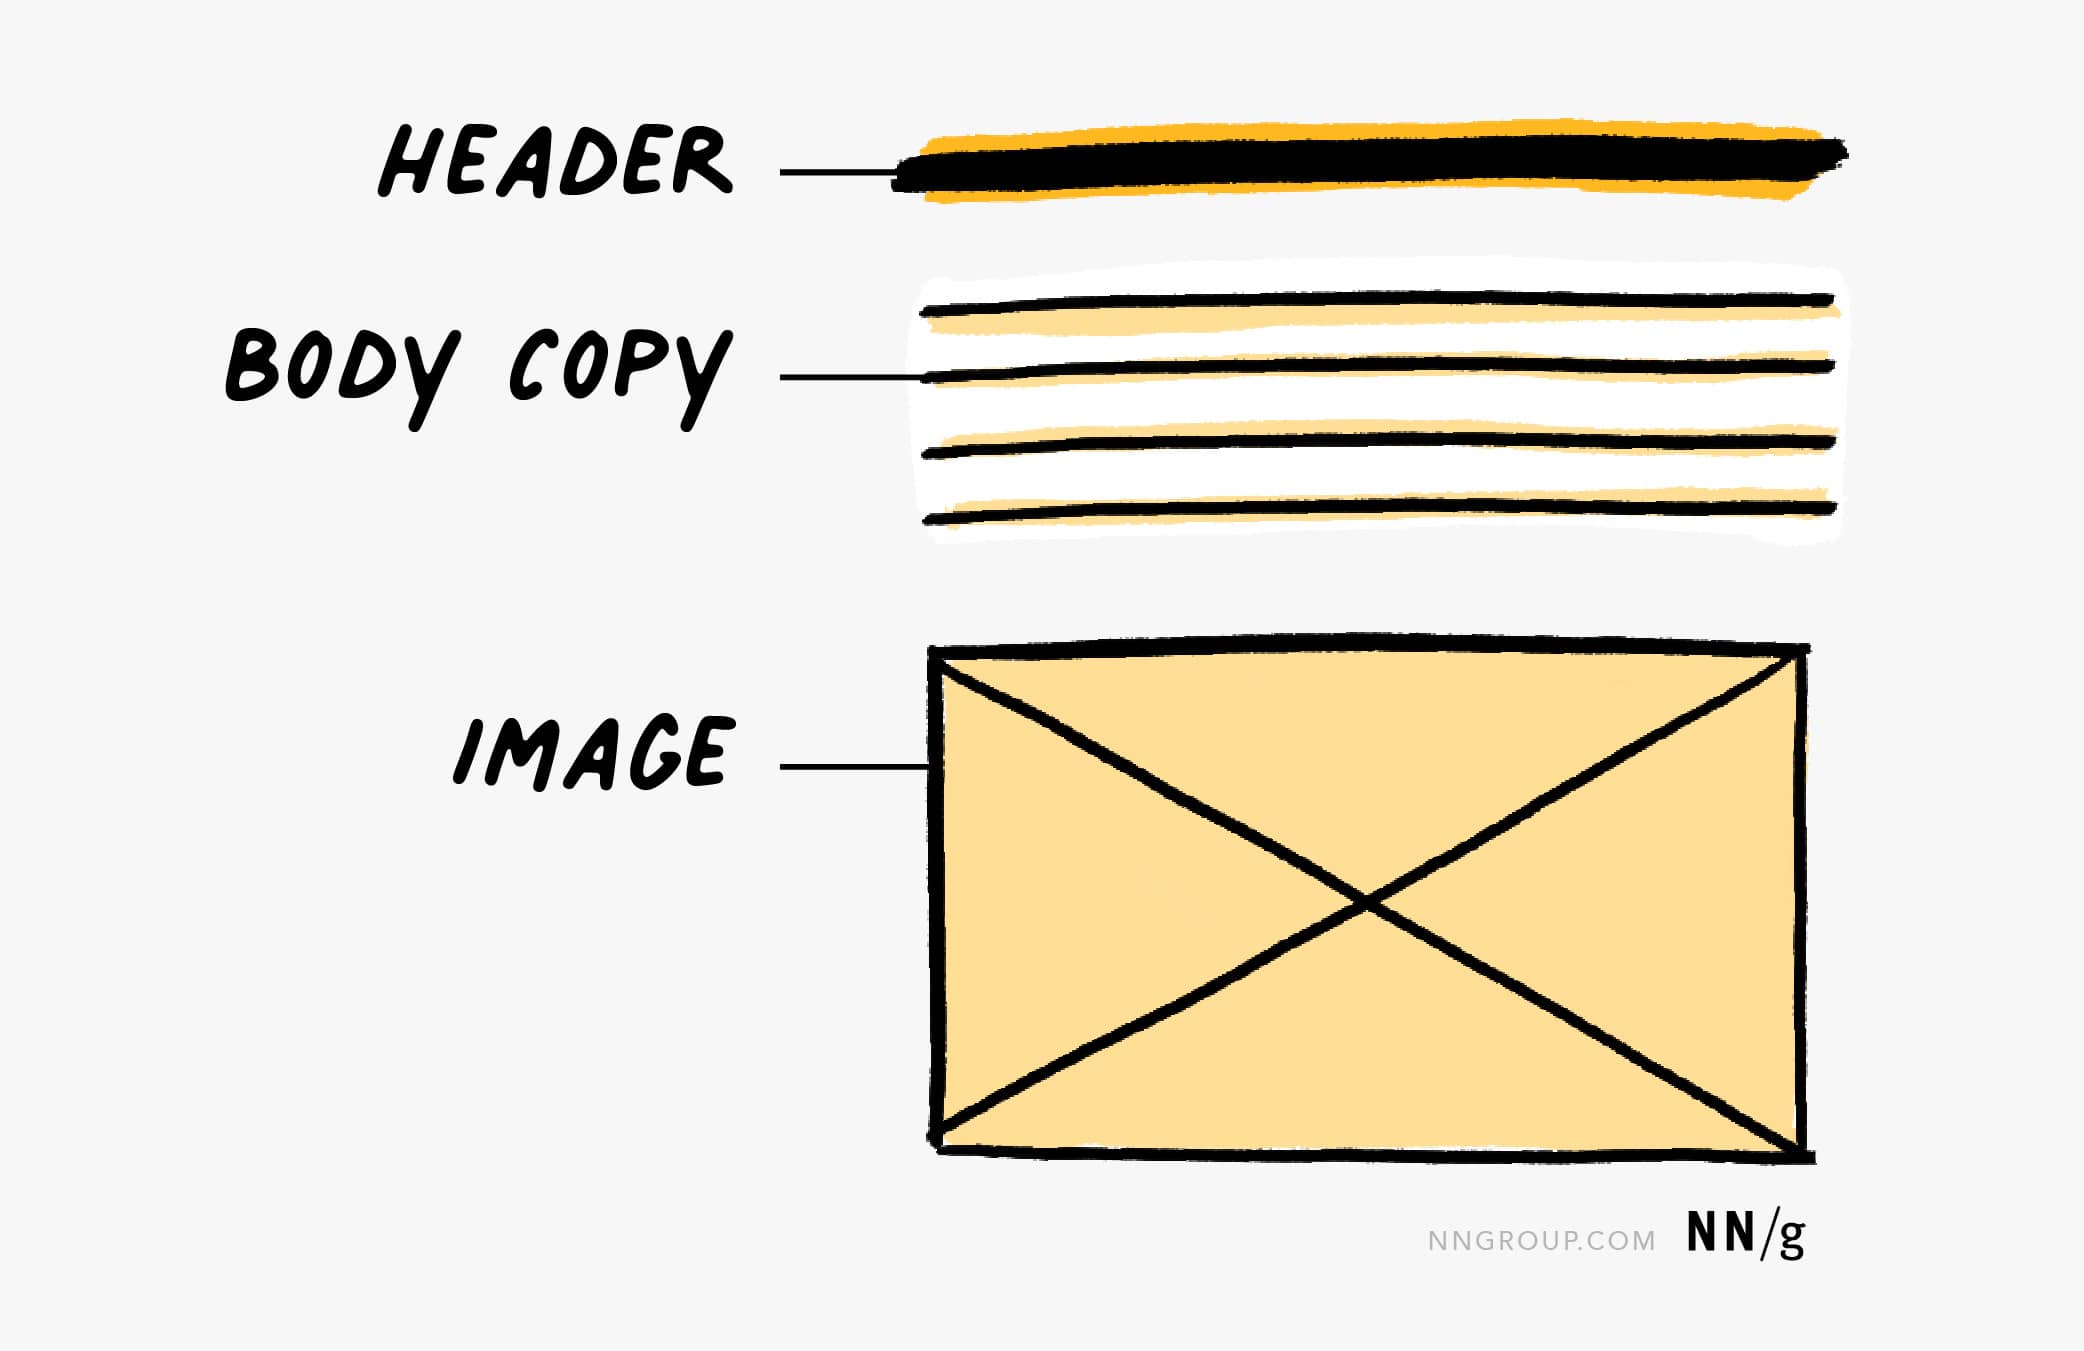
Step 3: Identify and draw the largest elements in your design.
Next, focus on drawing the main pieces of your idea — for example, headers, large banners and images, or even large sections of body copy. Here are some common wireframing conventions:
- Headers are illustrated using thicker lines.
- Body text is sketched using thinner lines.
- An image is represented as a rectangle with an x through it.
Step 4: Fill in the remaining details.
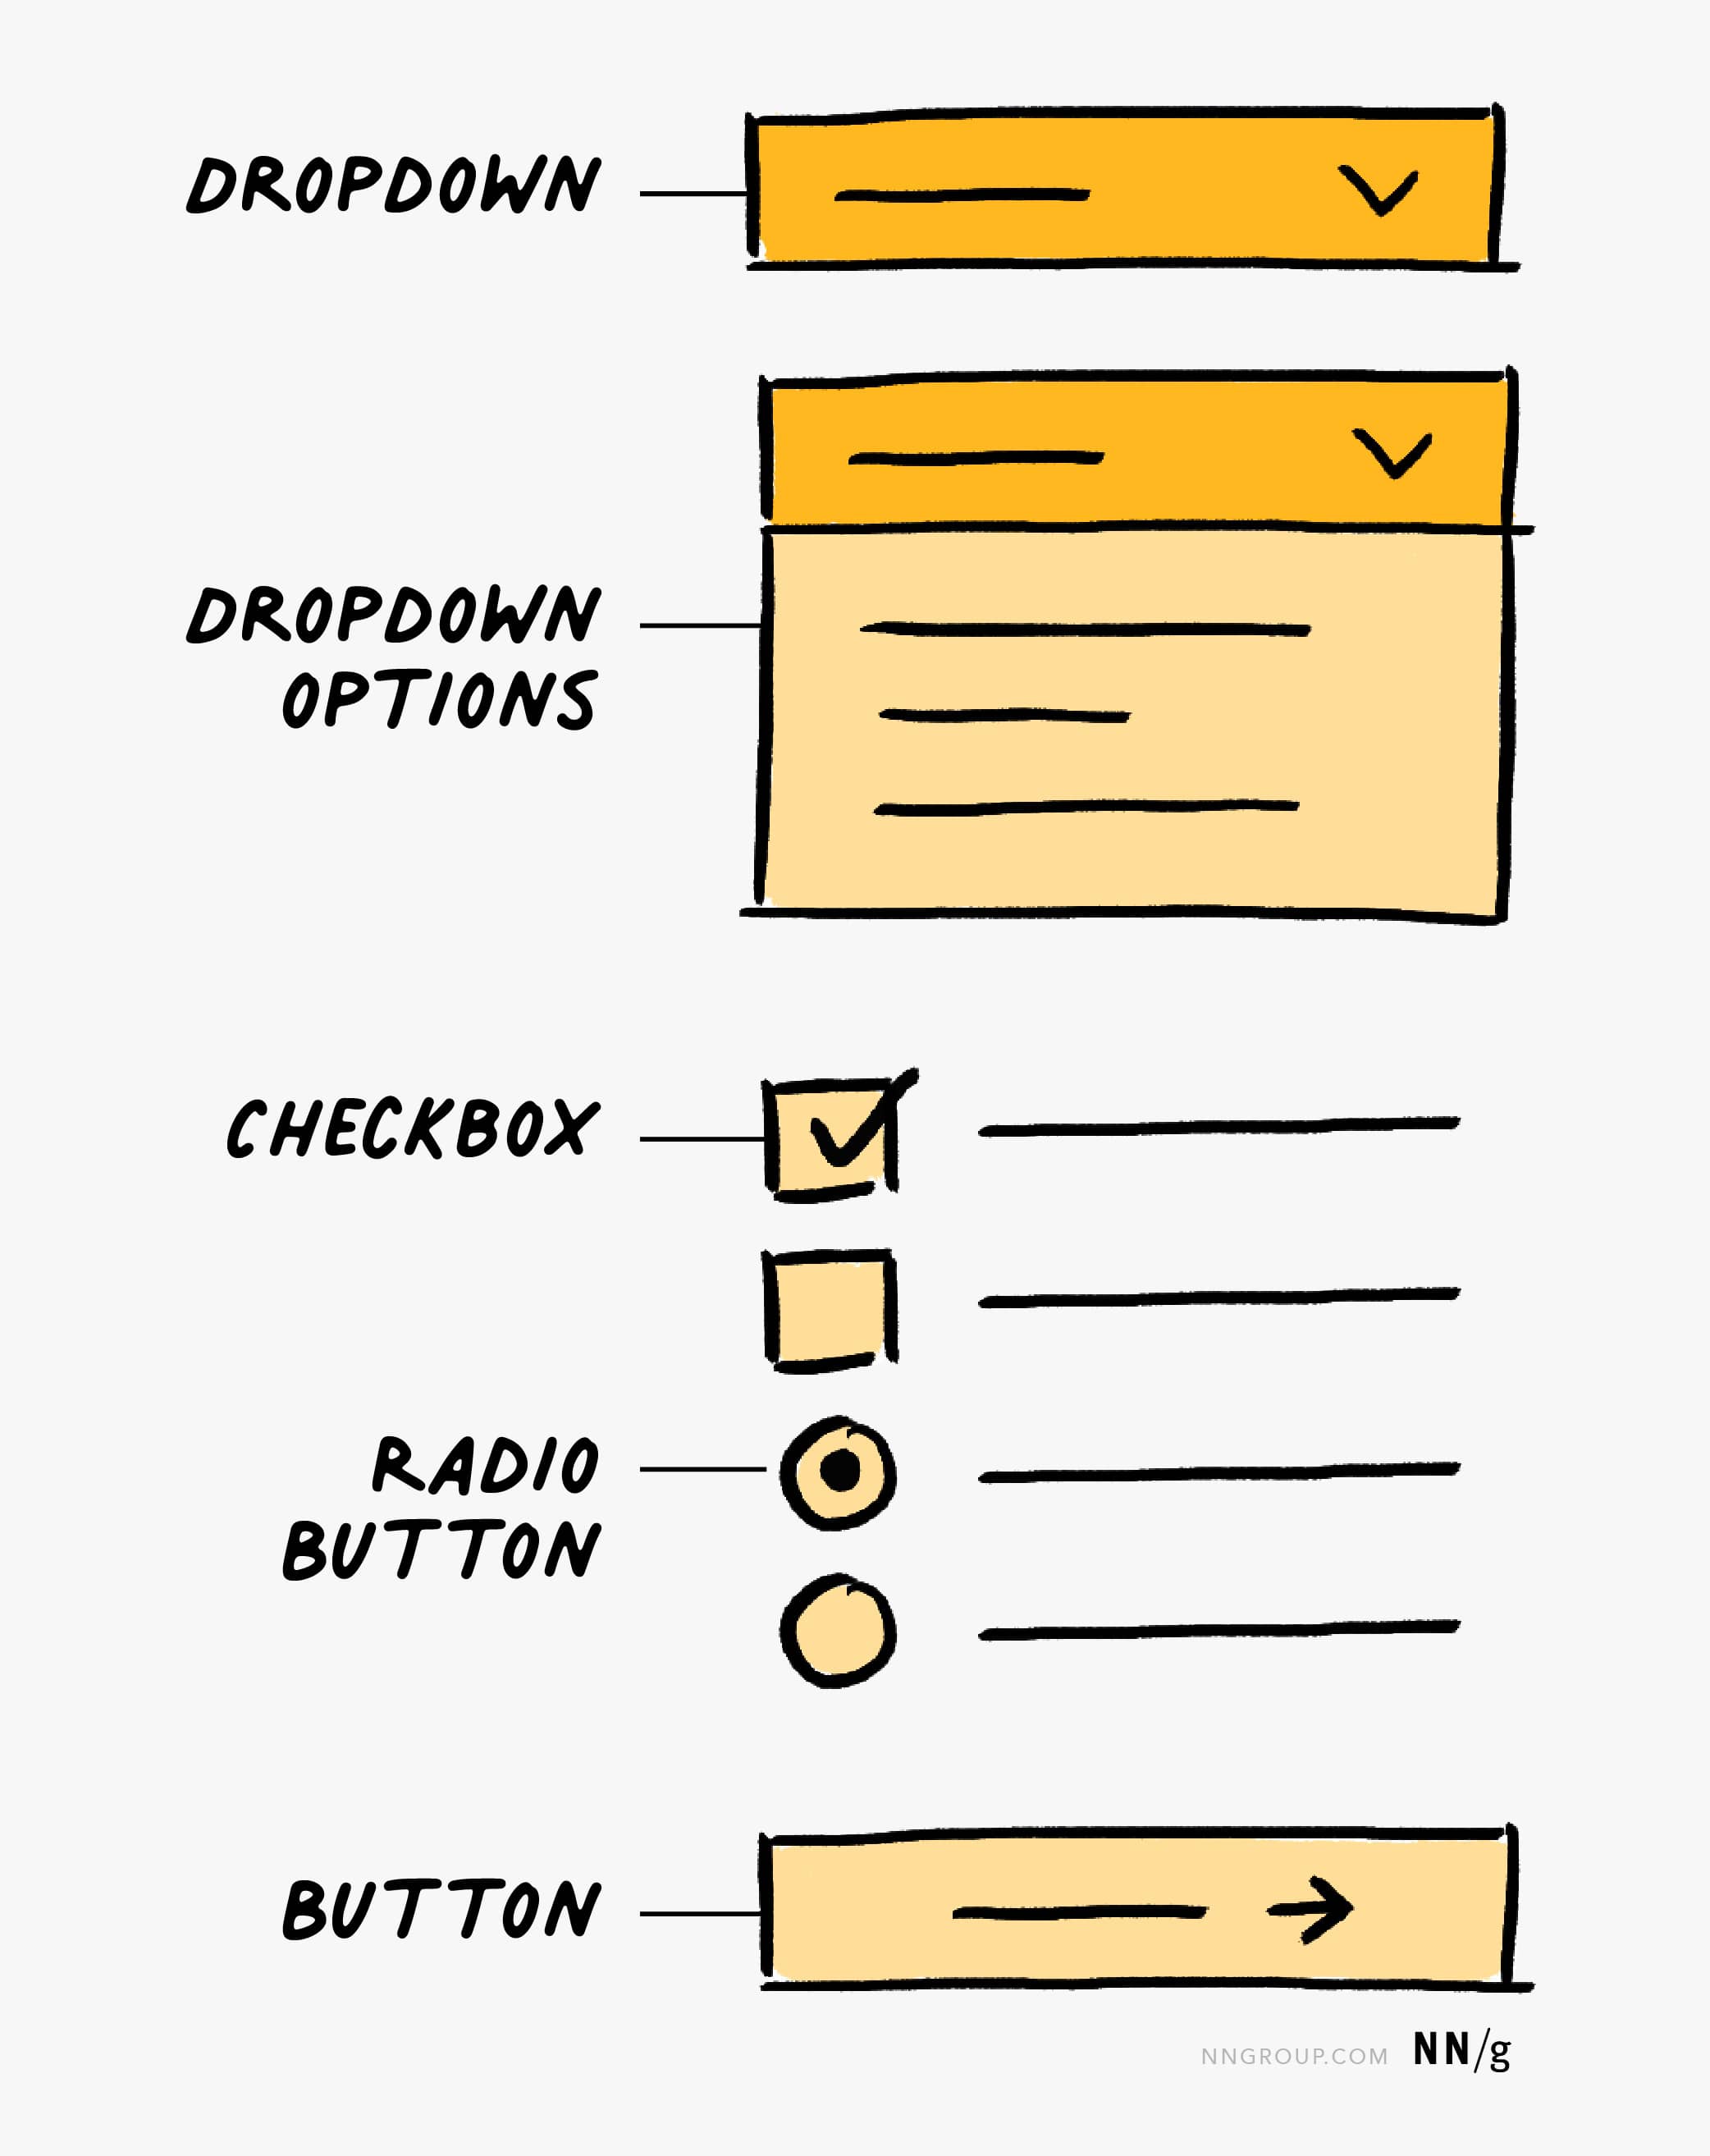
Generally, these details are small selection-related components like buttons, dropdowns, checkboxes, or ratio buttons, but can also include text fields or any remaining single lines of body copy. If you’re wireframing several screens that are part of a flow, you may also have progress bars and dialogs. Don’t forget to add calls to action or show selection, as these details help others understand your design idea.
- Dropdowns are made of a rectangle and a caret.
- Checkbox and radio buttons have a square or circle, respectively, and a line to represent text. To show selection, checkboxes should have a check and radio buttons will be filled in.
- Buttons can be represented in many different ways. Generally, a basic rectangle with a line or an arrow to represent that it takes the user somewhere else is best. However, for calls to action, also include a text label to provide key details to others looking at your wireframes.
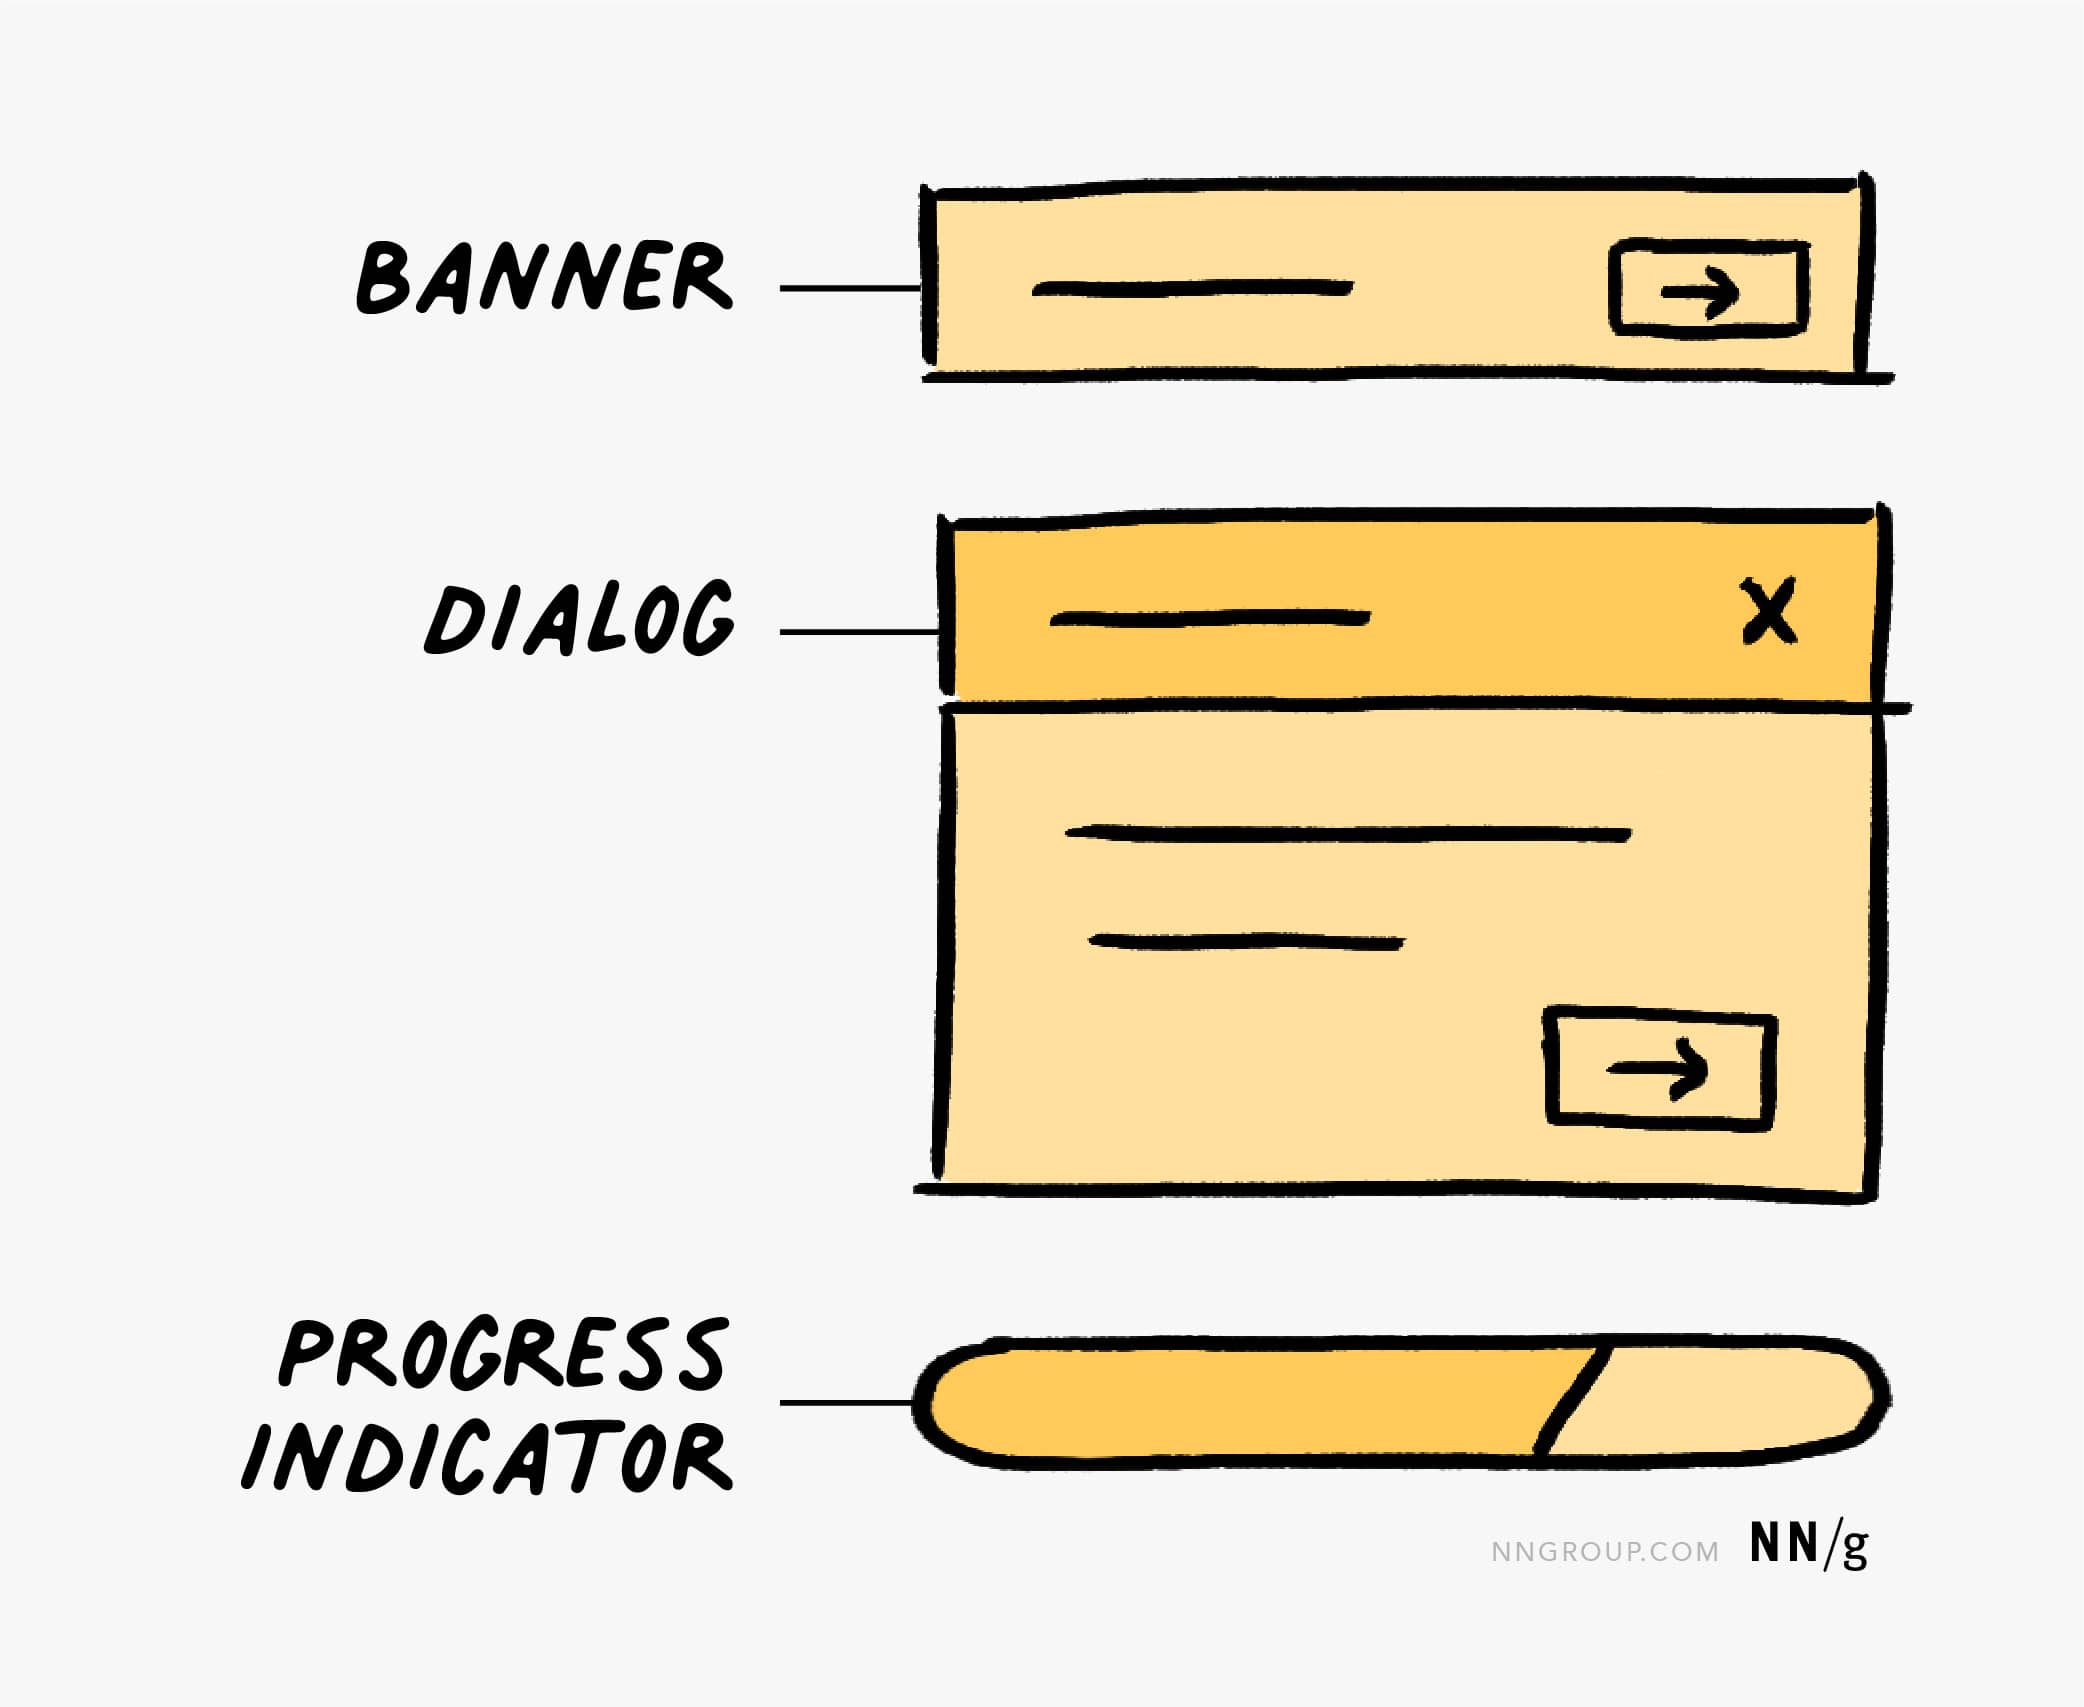
- Banners have a line or two of text, with an optionally related button or Cancel icon.
- Dialogs contain a header, 1–2 lines of text, 1–2 buttons, and a Cancel icon.
- Progress indicators are rounded rectangles that are partially filled to illustrate the remaining wait time.
- Icons can be represented in the same way as images (with an X) or as coarse line art (like we show here for search icons). Although we recommend text labels for icons in the final UI, the label can be skipped for the icon placeholder in a wireframe.
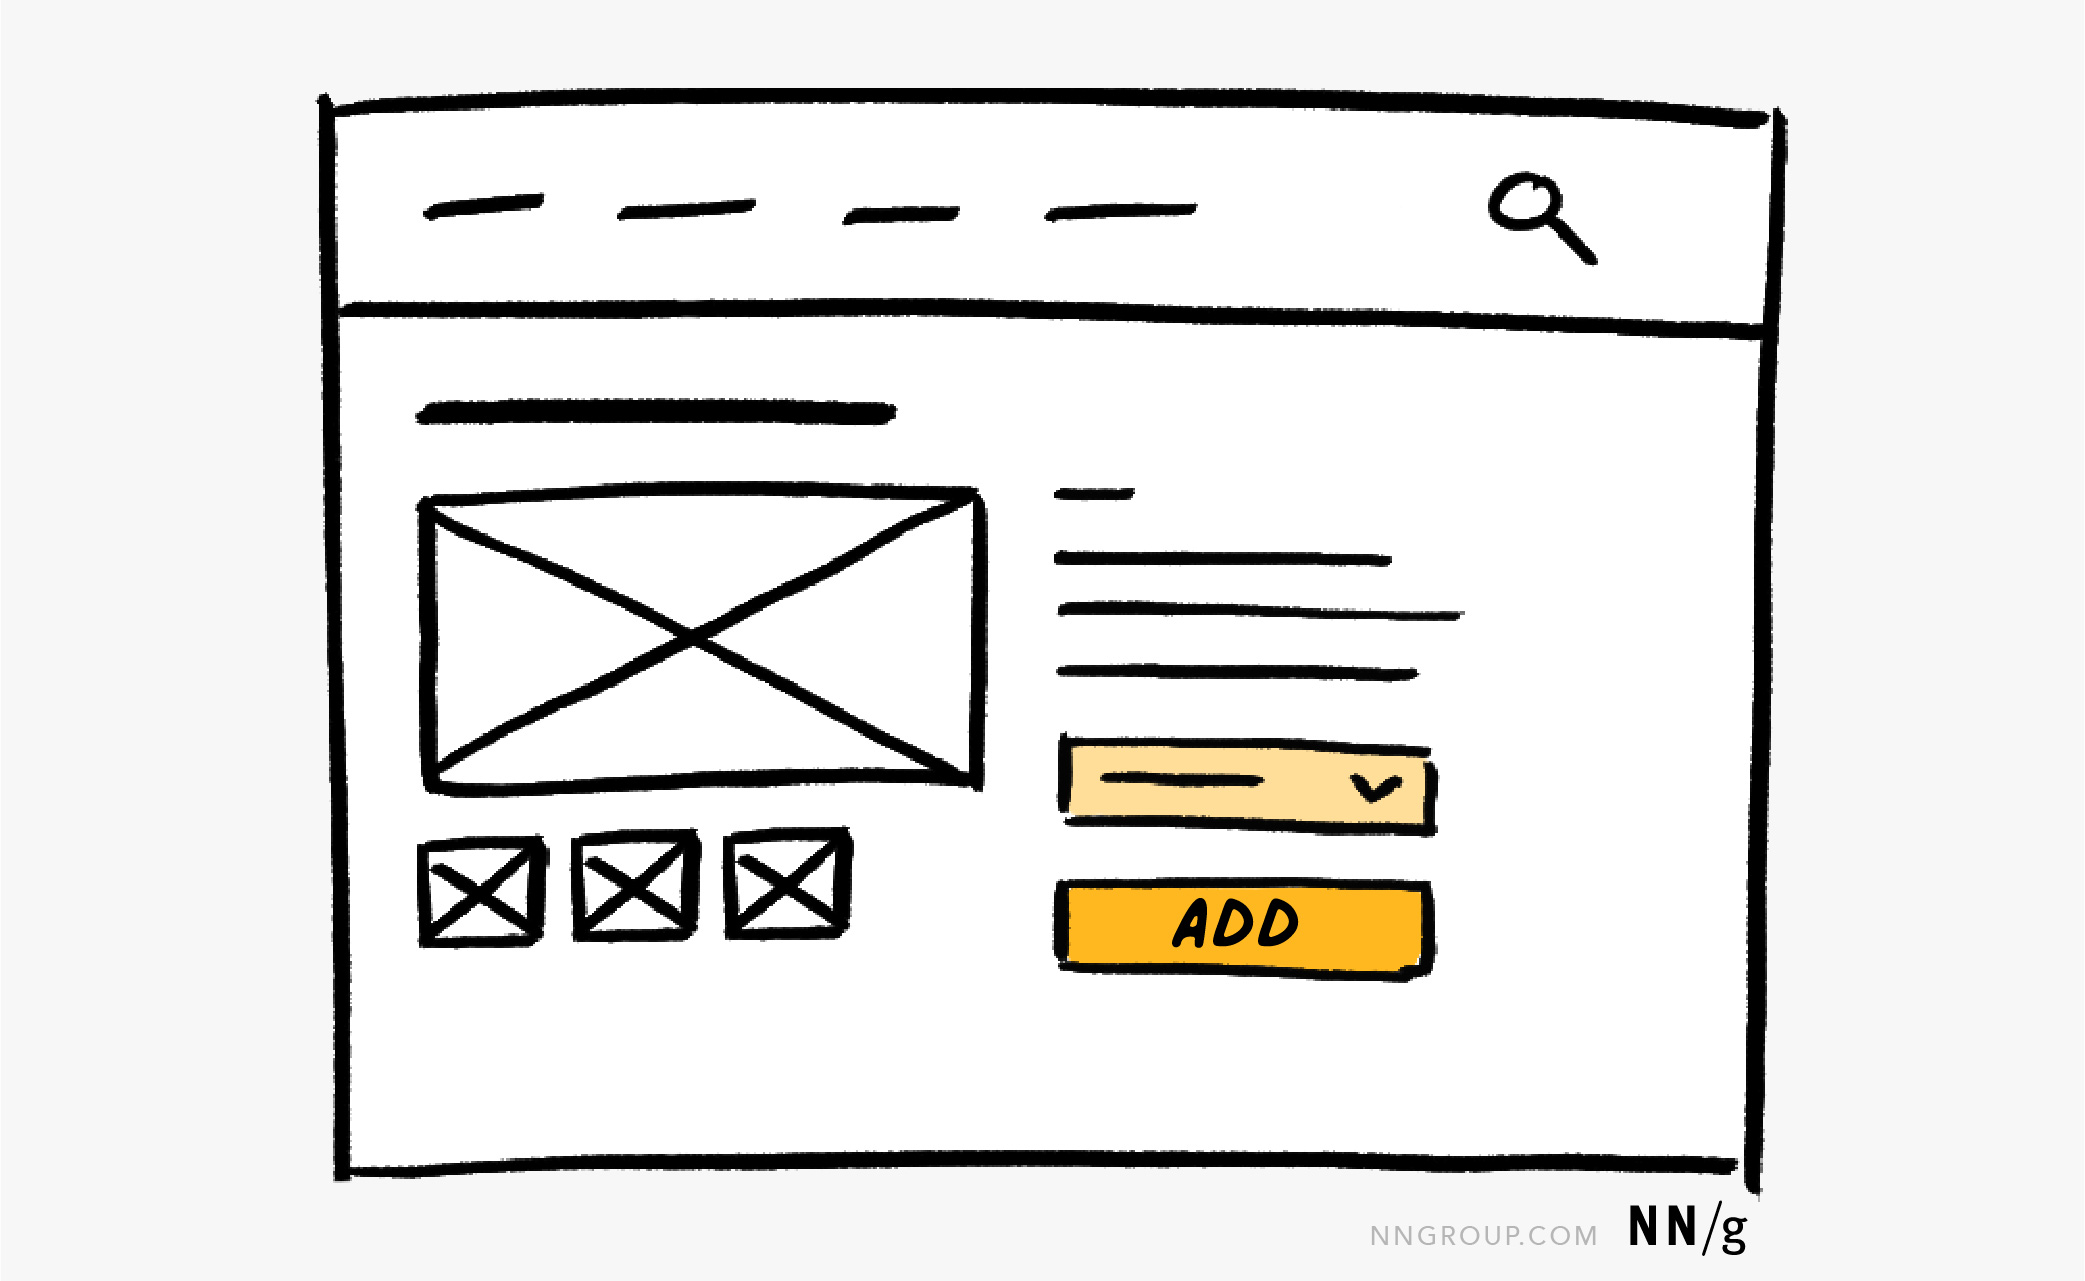
An Example: Sketching a Product-Detail Page
We illustrate below how these steps could result in a simple wireframe for a product-detail page.
Step 1: Since our design is for a desktop webpage, we start with a blank canvas of size corresponding to a common browser window.
Step 2: We add a top navigation bar and search to our wireframe.
Step 3: Draw the largest element in the design. Since the wireframe represents a product page, at this stage we focus on displaying product-related information such as name, description, and images.

Step 4: Add additional details such as dropdown box for selection options and a button to add the product to the shopping cart.
Conclusion
Anyone, regardless of their ability to draw, can sketch a wireframe to explore possible solutions to design problems. Take things step by step and use common components to create quick, messy, yet helpful wireframes.


Share this article: