Remote moderated usability testing has a lot of advantages. Compared to in-person studies, it’s often less expensive, less time-consuming, and more convenient for participants. In cases where participants can’t travel to a testing location, remote moderated usability testing is an excellent alternative.
Perhaps the biggest downside to remote moderated usability testing is that it can require lots of advance preparation, particularly in setting up the tool you use. If you’ve never done a remote moderated study before, it might be tough to know where to begin.
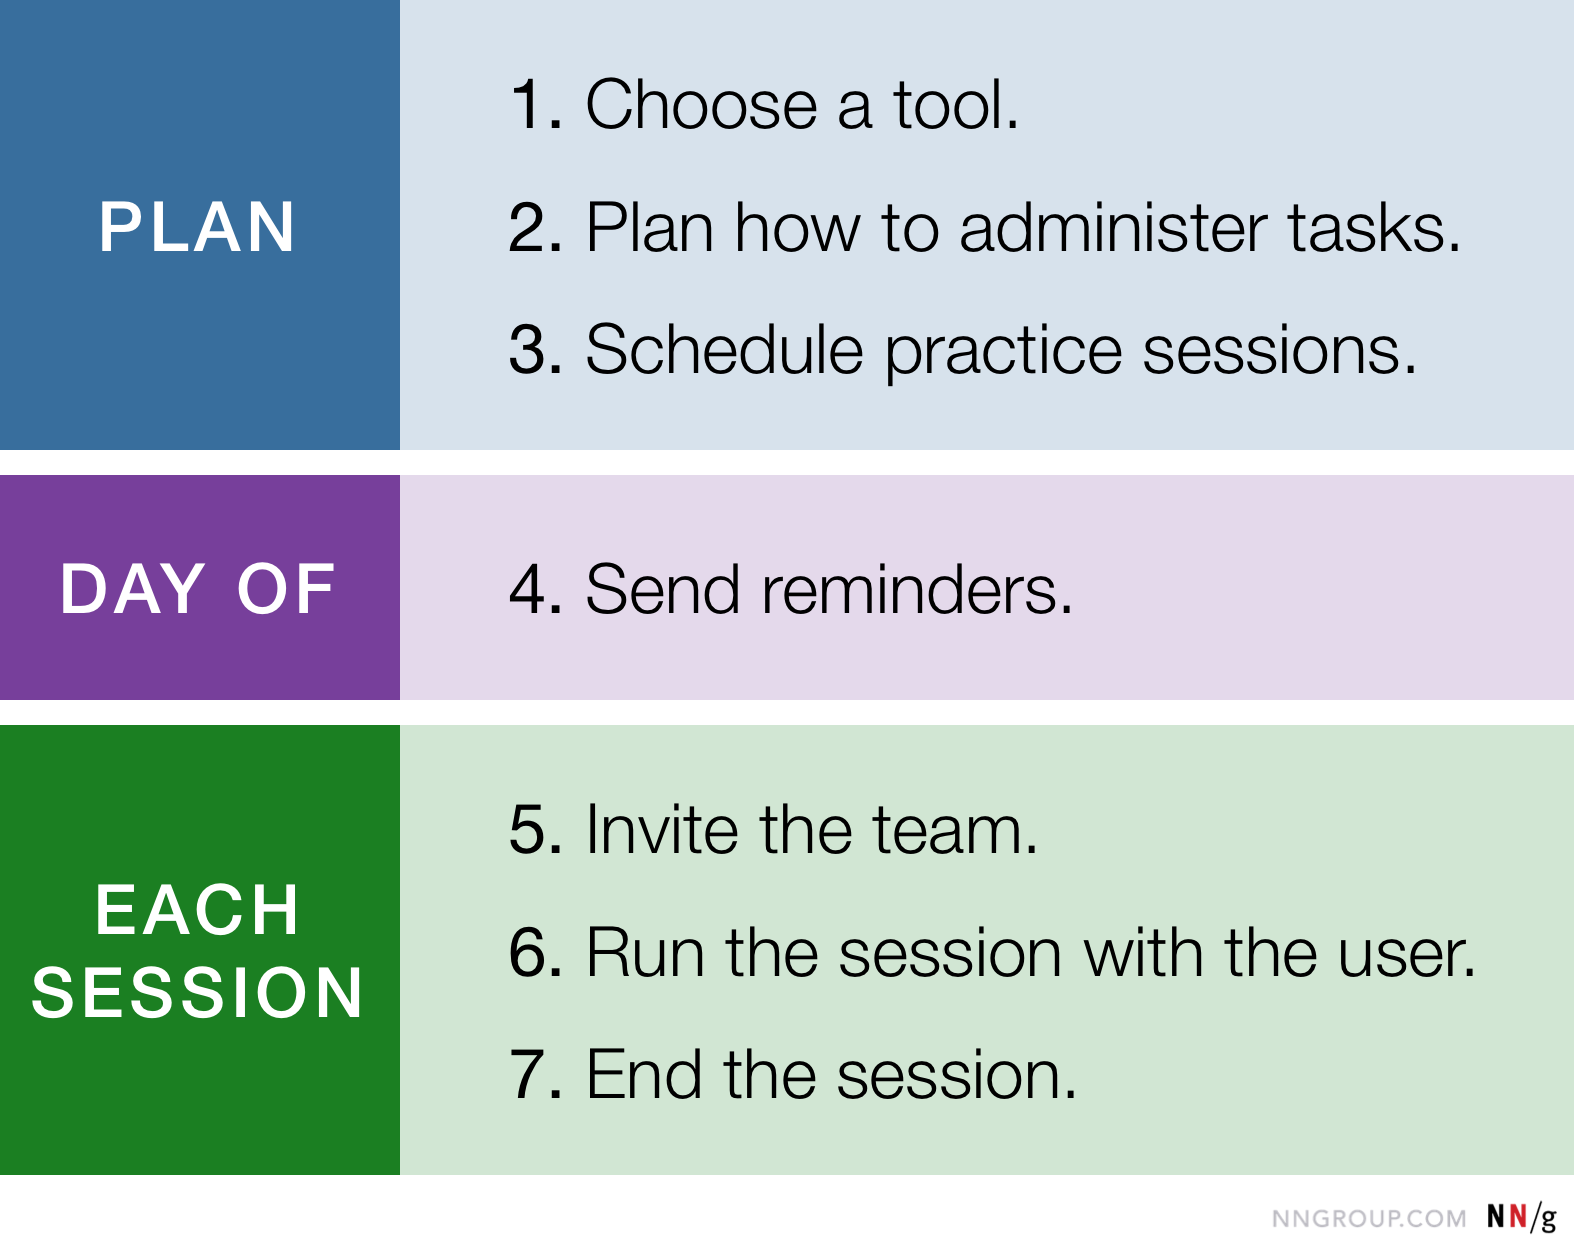
Follow these 7 steps to ensure your remote moderated sessions run smoothly and yield rich, deep insights.
Study Planning
1. Choose a tool for communicating with the participant.
Choose a screen- and audio-sharing tool that will be easy to access and install for testers, but also for observers and facilitator.
You don’t have to use the same tool for all test participants. For example, those joining from their office computer may need to use a company-sanctioned meeting tool. Others may not be able to install any software — for example, due to an aggressive firewall.
There are many screen-sharing tools available, but some of the tools we use for remote testing include:
- Zoom
- GoToMeeting
- Join.me
- Skype
- Lookback.io
When you choose your tool, pay special attention to the installation requirements. Are there any operating systems or browsers on which the tool doesn’t work?
For example, Lookback offers remote moderated usability testing on mobile, but doesn’t support all versions of iOS or Android. Figure out those details early, as they may play a role in your recruitment process. If possible, you’ll want to screen participants to make sure they can use the tool. Also, be aware that many remote moderated usability-testing tools for mobile can have stability issues — it’s tough to perfectly support all the different types of mobile devices out there.
Also, think about how you’ll handle observers in this tool. Make sure that you can mute them during the session to prevent any unnecessary noise. If the tool has a chat feature, it should be possible to keep team conversations private so that participants don’t get distracted. You can also use a separate tool (e.g., a messaging app like Slack) to allow observers to communicate among themselves or with the facilitator.
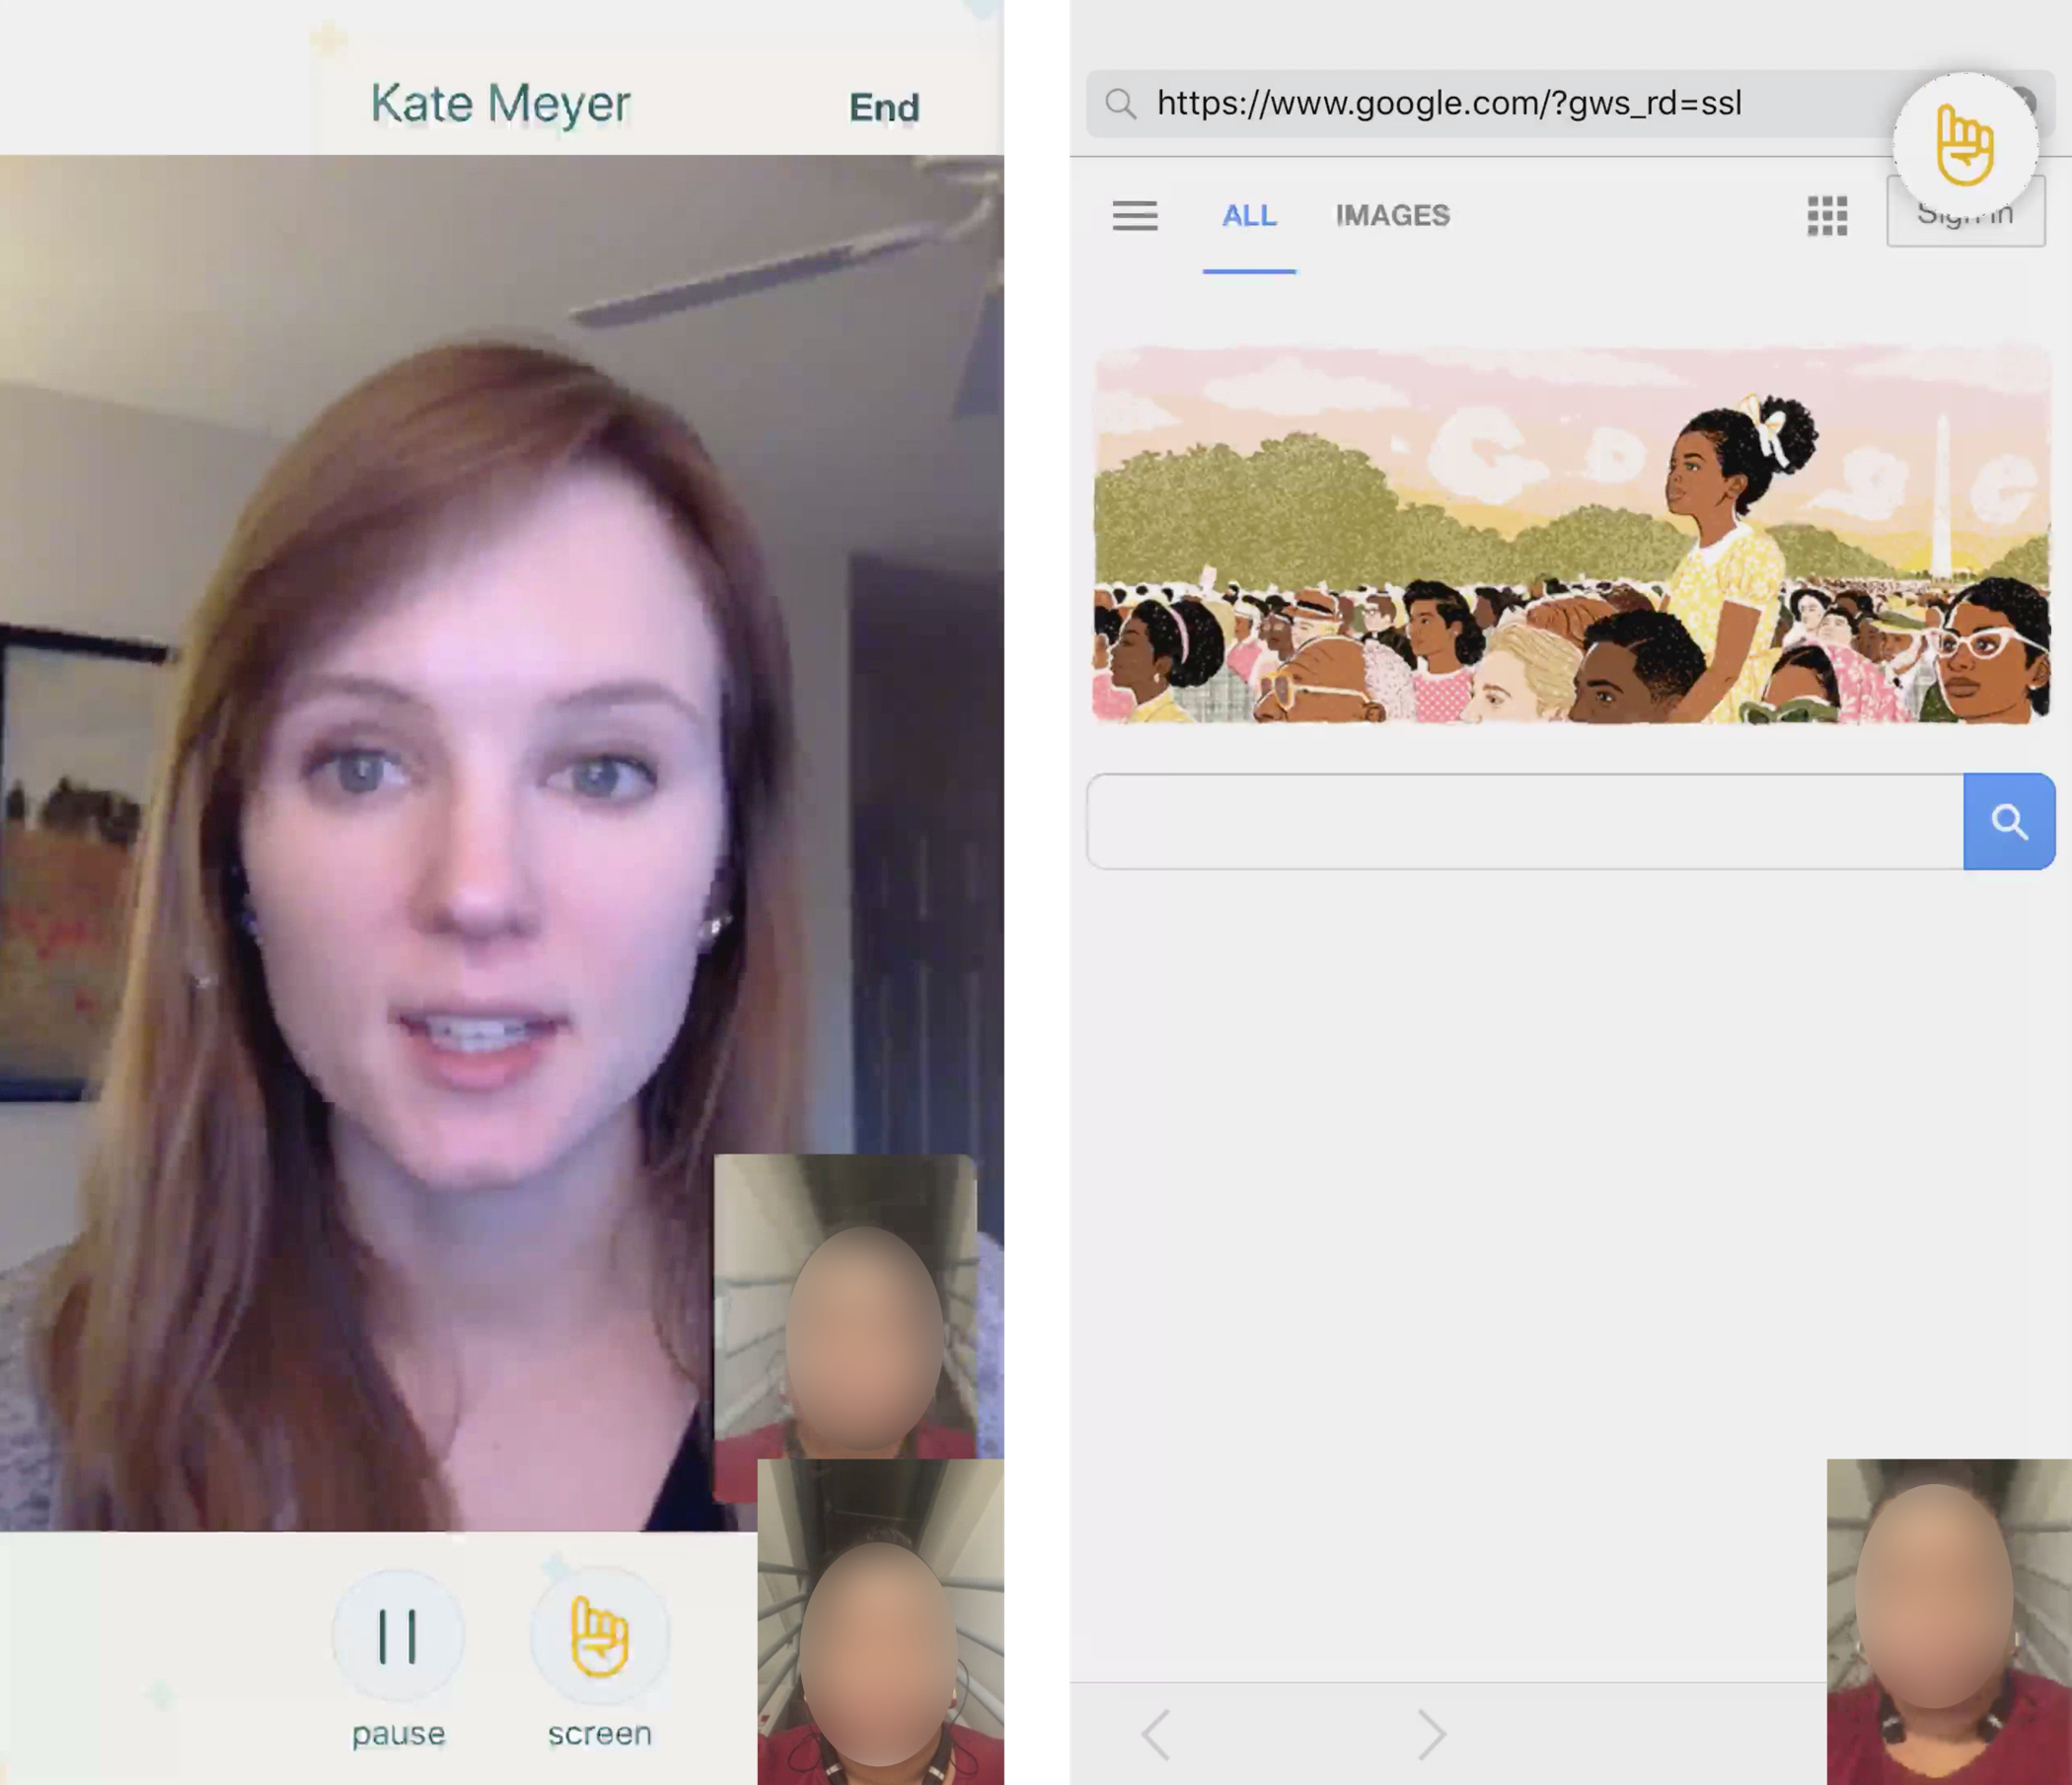
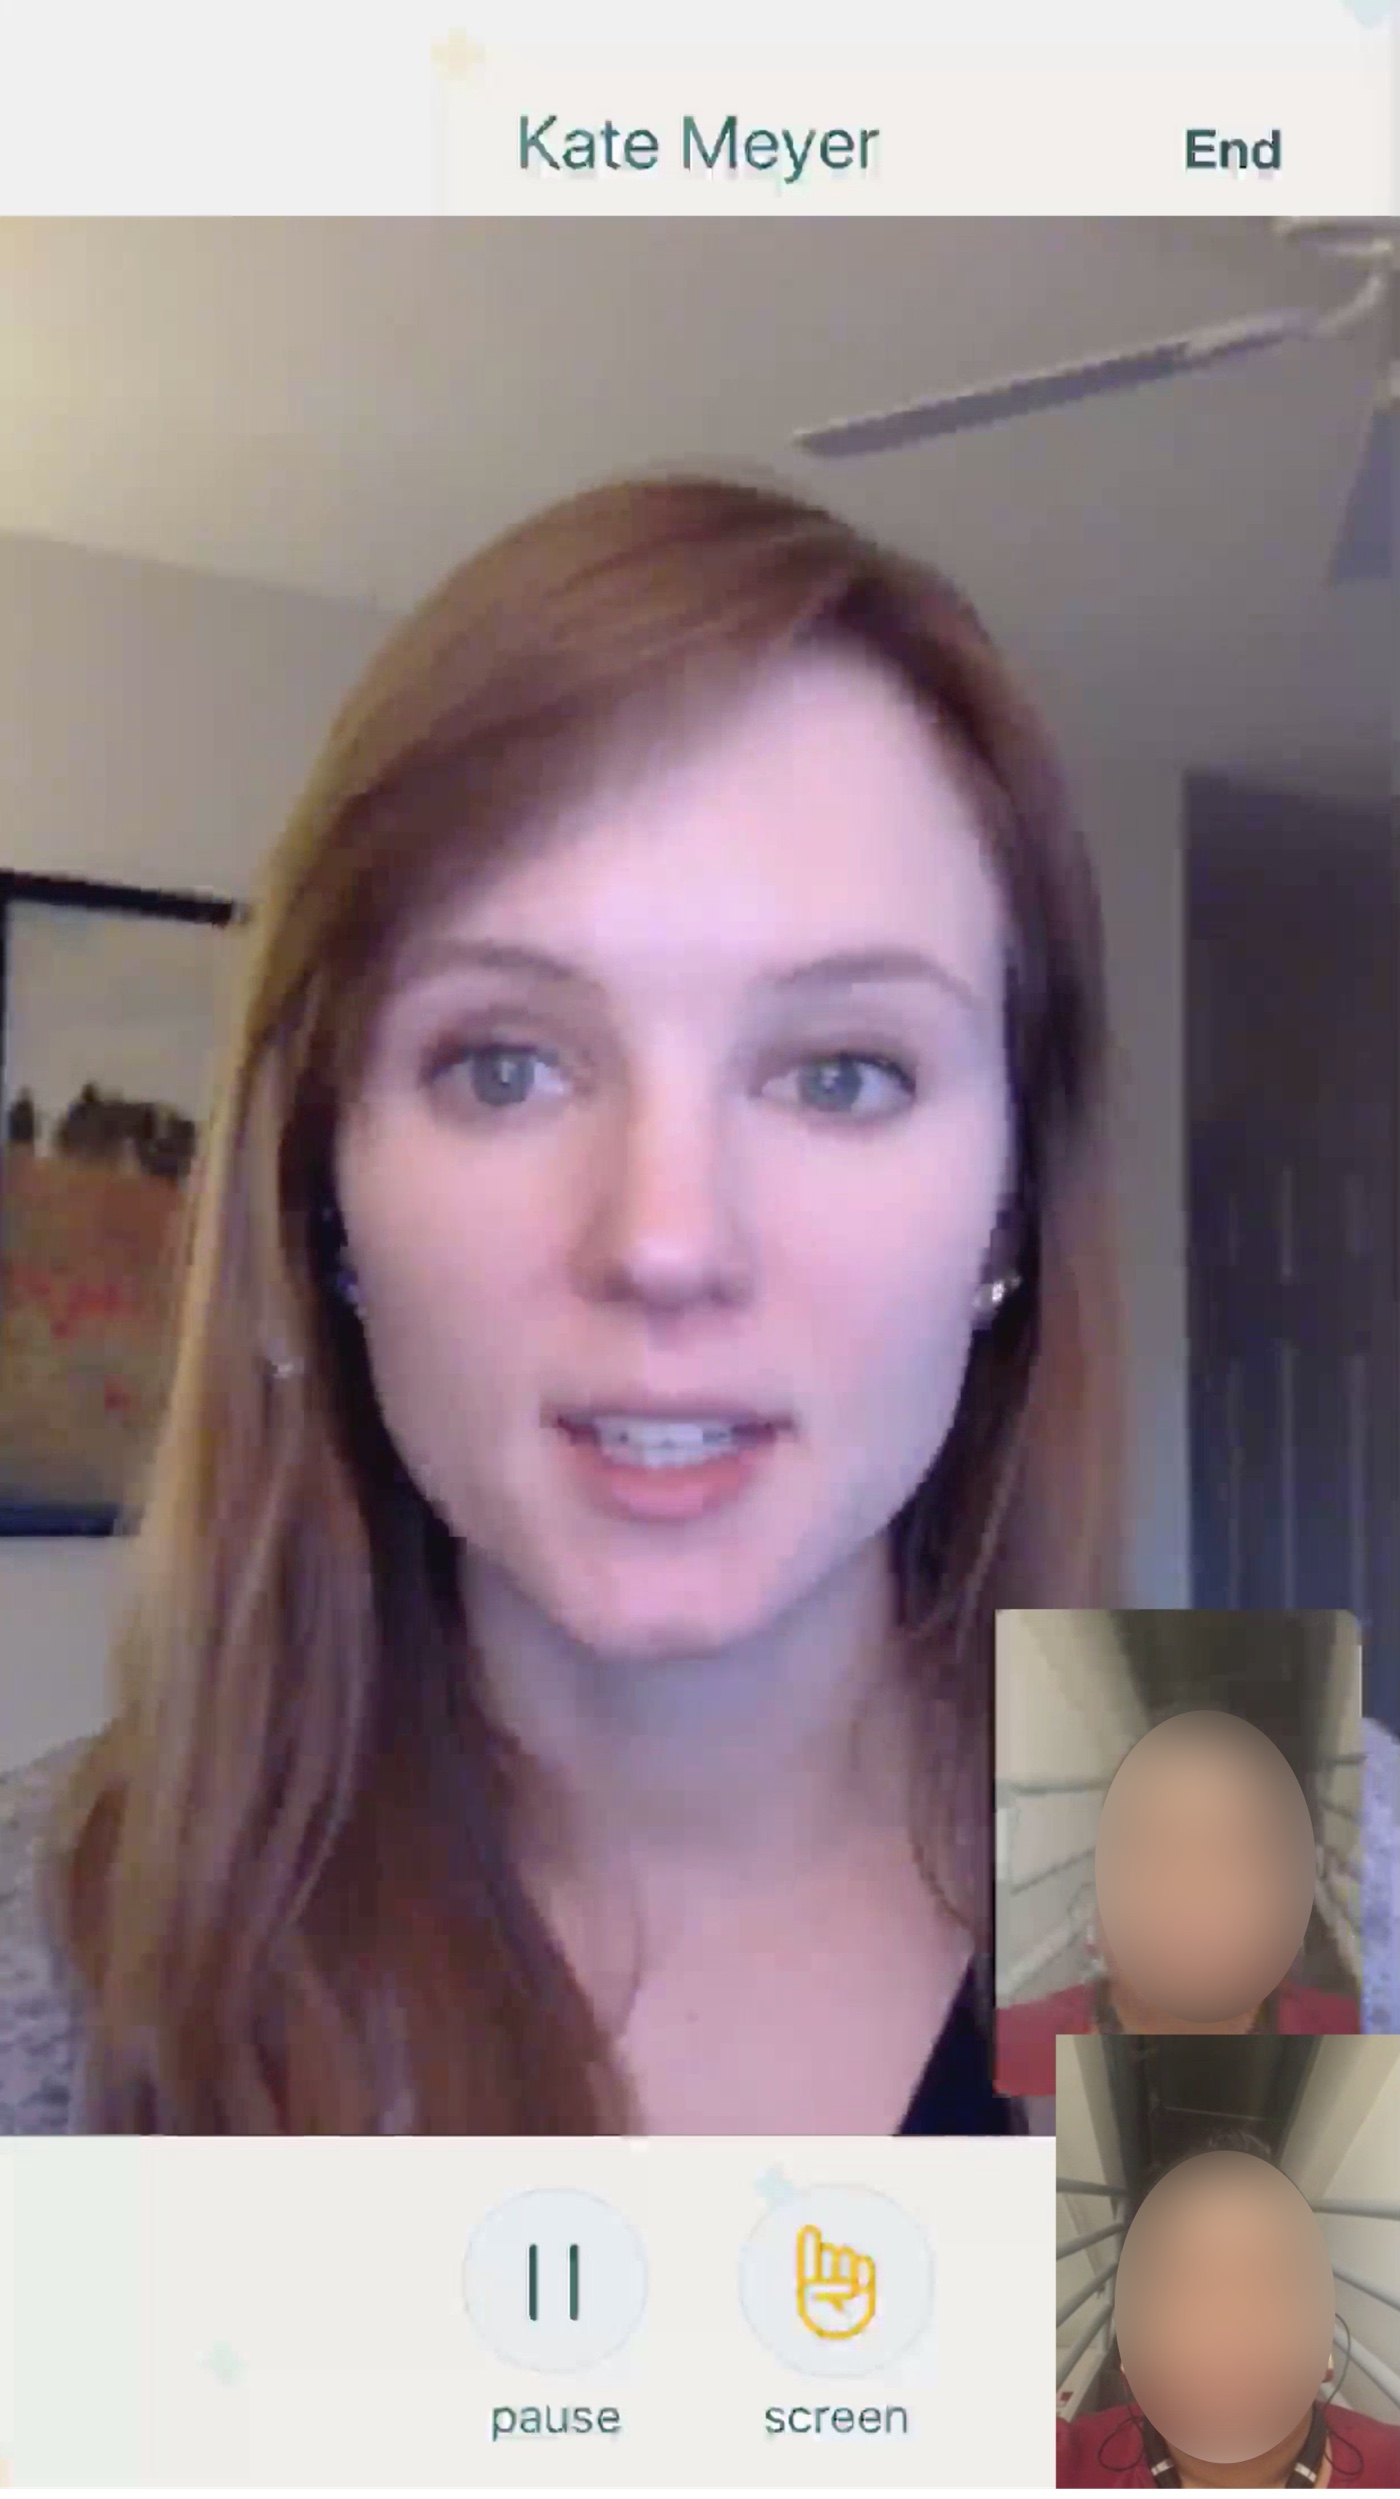
Decide whether you’ll want to share webcam video. If your system and connection can handle it, it’s almost always best to share the participant and facilitator’s faces, as it improves the communication during the session.
2. Plan how to administer the tasks.
With in-person testing, you can just hand the participants a sheet of paper with the task printed on it, and ask them to read it out loud. Administering tasks is a bit more complicated with remote moderated tests, and it will likely depend on the tool you’re using.
The ideal way to deliver tasks is one at a time, and by asking participants to read the task out loud themselves. That way:
- You know they’ve read the entire task.
- They won’t look ahead to later tasks.
- They will practice speaking out loud.
In addition, you want participants to have the instructions easily accessible as they are doing the task, to be able to refer to it in case they forget them.
There are three options for delivering the task for remote moderated testing:
- Send participants a document (e.g., pdf) with all the tasks.
- Use the screen-sharing tool’s chat window to send the text of the current task to the participant, during the session.
- Have the moderator read the task out loud to the participant.
Send participants a document (e.g., pdf) with all the tasks (or with links to the tasks).
In this case, participants must be instructed to not read through the tasks before the session. If the document contains the task text, make sure you start with a blank page and that each task is presented on a separate page. Include page numbers to be able to guide participants to a specific task. Participants can print the document in advance or refer to it electronically during the test session.
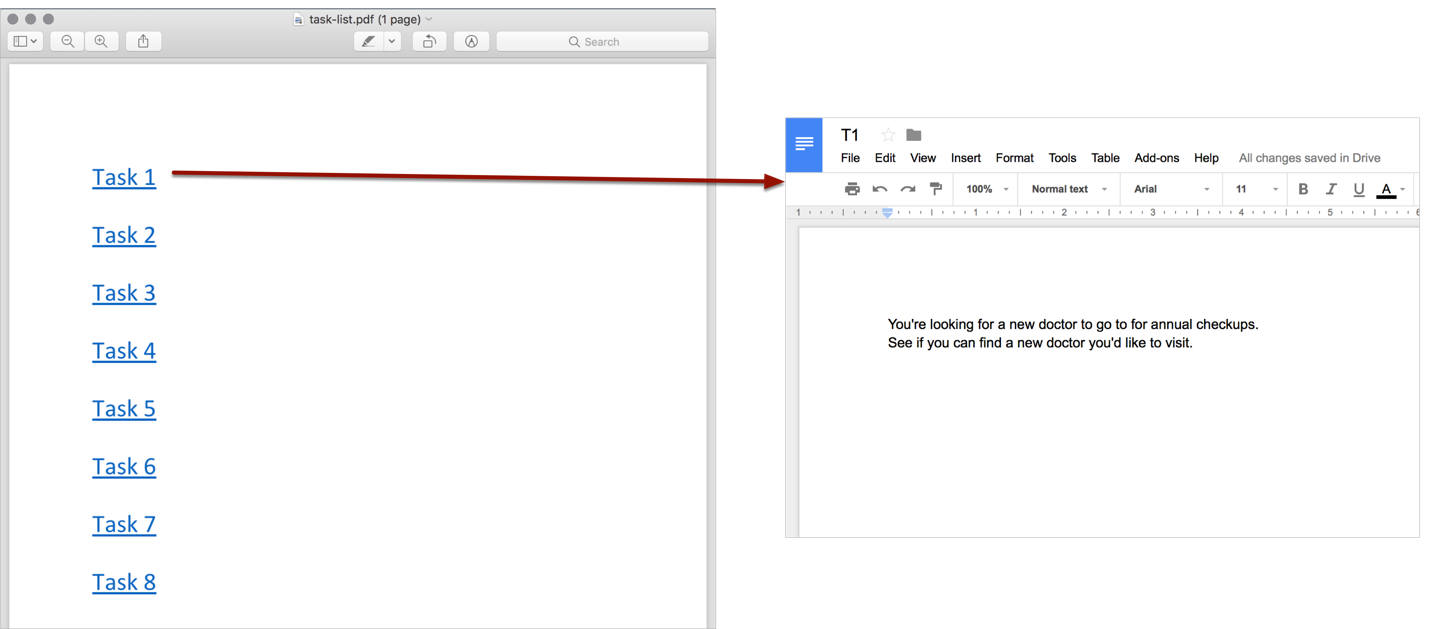
If a digital document can be accessed during the session, you can also include links to the task text instead of the text itself. In that case, each task’s instructions can live as a webpage (e.g., a Google Doc) on the web and the participant can be asked to click on the corresponding link to read that task.
Use the screen-sharing tool’s chat window to send the text of the current task to the participant, during the session.
For example, Zoom has a chat feature that allows attendees to send each other links and text. The chat window is a convenient way to deliver task instructions; ask the participant to read the instructions out loud before beginning.
Have the moderator read the task out loud to the participant.
Although this method is the least advisable, it may be the only option sometimes (for example, because of tool or device limitations). If you choose this option, prepare to reread the task instructions multiple times, as needed.
3. If possible, schedule technology-practice sessions.
For each participant, try to schedule a 15-minute online meeting the day before her session. Also invite one or two practice observers.
This is the time to get participants to set up the technology needed for the test. Have them install any necessary applications, and work through any hiccups with screen sharing, audio, and reaching websites.
Choose a website or app completely unrelated to the one you plan to test, and ask participants to use it, briefly. In this practice session, don’t show users the actual website or prototype that you plan to test, and don’t have them attempt test tasks. If participants need to physically sign consent or NDA forms, now it is the time to discuss the logistics and ensure that they can access the documents and know how to send them back to you before the session.
If practice sessions are not possible due to scheduling constraints, make sure you leave some extra time for setup during the actual session.
Be aware that even if you have a technology-practice session, you may still encounter tech problems during the session. We’ve had situations where a participant’s setup worked perfectly in a practice session, and then didn’t work at all the next day (for example, due to her computer automatically updating its operating system overnight). It’s always best to add a little extra time to each session to ensure you can deal with minor problems without ruining the session.
On the Day of Testing
4. Send out reminders.
As with any type of testing, send reminder emails to participants and observers, either the night before or the morning of testing.
For participants, remind them when their session begins, and of anything they need to bring or do during the session. For example, you might remind them to:
- Have their laptop connected to a charging cable, or their mobile device fully charged.
- Have a headset or pair of headphones to minimize feedback and improve audio quality.
- Open the remote software tool they practiced using during the technology-test session.
- Be connected to a strong WiFi or wired connection.
- Be in a quiet place where they won’t be interrupted.
For observers:
- Remind them of the testing schedule.
- Tell them any rules for observing (for example, join five minutes early, or keep yourself on mute).
- Give them tips for observing the study, a copy of the tasks that users will attempt, and specific issues you want them to watch out for.
During Each Session
5. Invite the team to join the session.
The exact time when observers should join the session varies depending on:
- the remote-software tool
- whether the technology-practice session with the user was successful
- your relationship with the observers
Joining early, a few minutes before the session starts, has the benefit of being least disruptive to the participant, especially if the remote tool beeps whenever a new person has joined the meeting. But the disadvantage is that it may potentially waste observers’ time and diminish their engagement.
If the latter is a concern, it’s ok to have observers join the session once all the logistics have been cleared (usually, a few minutes after the scheduled start time). Alternatively, you may be able to keep observers busy during the down time by asking them to discuss the previous session’s findings or review the observer tips and think about specific issues.
6. Start the session with the participant.
Once your participant has joined the meeting at the agreed time, run through some variation of the following script:
- Hi [name], thanks for joining.
- I am [XXX]; I work for company [YYY]
- Before we begin, is [name] the correct way to pronounce your name?
- OK, thanks.
- I have some colleagues here with me. They’ll just be quietly observing the session, looking for ways we can improve the [site/app].
- Is it ok if we begin recording?
- [Wait for confirmation, then begin recording.]
- [If the participant has not already signed the consent form, perform the following steps.]
- [Share your screen.]
- [Open the consent form you’d like your user to read out loud.]
- This is a consent form that explains what we’re doing here today and how we will use the information. Please read this out loud, and then if you agree, please say your full name out loud.
- [Wait for reading and consent.]
- [Turn presentation control over to the user, for them to show their screen.]
7. End the session
- Thank participants for their help.
- Stop and save the recording.
- Check in with your observers to discuss the major observations for that session, and any changes to tasks or procedure you’d like to make going forward.
Repeat steps 5 through 7 until your study is complete. (Step 8: Pat yourself on the back for a study well done!)
More Tips for Good Remote Moderated Testing
- If you haven’t already obtained a signed consent form in advance, ask participants to read your consent form out loud, and then verbally give their consent by saying their full name out loud.
- Don’t neglect your own tech setup while you’re thinking about others! Use a headset and a strong WiFi connection, just like the participants should.
- Whenever in doubt, ask the user how to pronounce her first name. In in-person studies you can get the user’s attention with a gesture or sound. But if you need to interrupt the participant during a remote session, saying the person’s name can feel the most natural. But you want to make sure you know how to pronounce it.
- Keep track of what time the session is supposed to end, confirm it with the user at the beginning of the session, and finish on-time.
- Accept that things will go wrong and have a backup plan. Software gets updated at the last minute, firewalls interfere, apps have bugs. When will you release the observers? The user? What if you need to reschedule? Just as with in-person testing, it’s a good idea to build in a little extra time to your sessions and recruit more participants than you really need.
- Do a pilot test to help refine your process, facilitation, and tasks. A pilot session is a test of the test itself, and not a test of the design, so your participant can be either a representative user or someone else.
Full-Day Seminar on Remote Studies
For detailed help planning, conducting, and analyzing remote moderated user testing (including sample scripts, research plan, and tasks), check out our full-day seminar: Remote Usability Testing.


Share this article: